How To Embroider A Moon
In this tutorial I’ll show you an easy way to embroider a moon. While moons are a relatively simple shape, they can be somewhat challenging to stitch uniformly and smoothly. Here is how you can easily stitch one and improve the way it looks!
How To Embroider A Moon Step By Step
Disclaimer: This post contains affiliate links, which means I may earn a small commission if you choose to purchase an item.
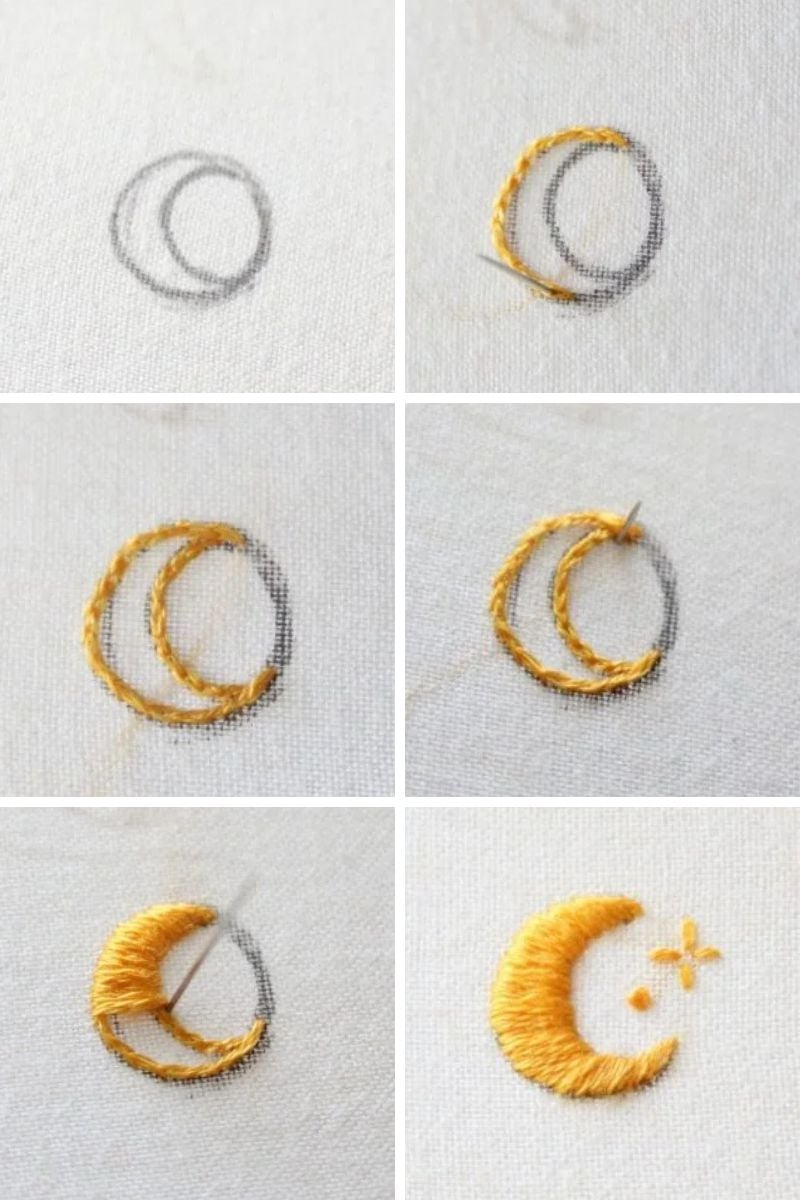
The first thing you’ll want to do is draw a circle and then add a C shape inside it. (It’s helpful to use a circle template to get a perfect circle.) I prefer to use a heat-erasable pen or marker for this, as you’ll want to remove the marks you’ve made once you’re finished. Drawing a circle first will make it easier to draw a neater, more even moon shape.
Then, using two strands of thread, split stitch along the entire outline of the moon shape that is created. The split stitch will serve as a guideline for your satin stitches, allowing the edges to be neater. (It takes a bit longer to do this, but I promise you that it makes a huge difference!)
Using four strands of floss, start at the tip of the moon and make satin stitches across the moon and over top of the split stitches you made. These stitches will be relatively horizontal, but you can slant them slightly towards the two points of the moon.
Finally, add a few stars surrounding the moon, and that’s it!
Moon Thread Painting Pattern
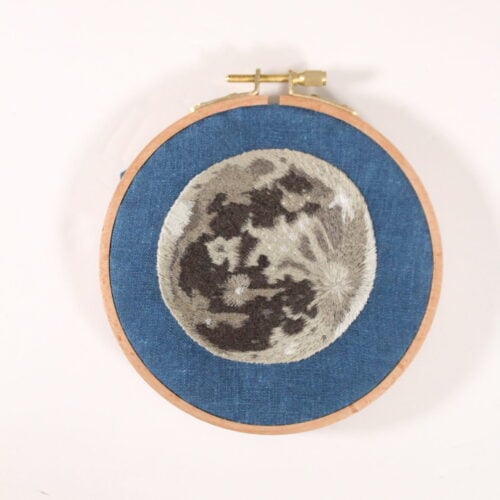
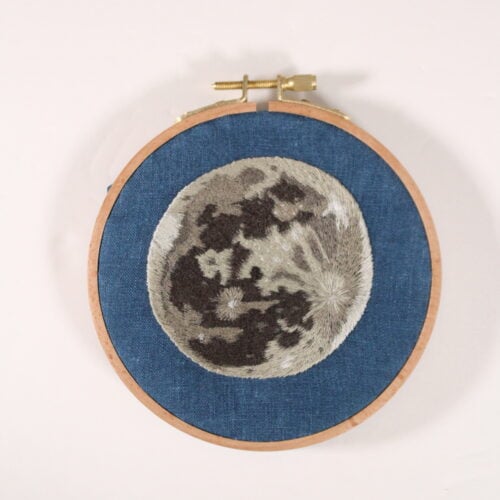
Interested in learning how to embroider a moon that’s a bit more detailed? You may enjoy these moon thread painting patterns, which will guide you step by step on how to embroider a vintage-inspired crescent moon or a realistic full moon.
-
 Product on saleRealistic Full Moon Embroidery PatternOriginal price was: $10.00.$9.00Current price is: $9.00.
 -
Product on saleMoon Embroidery PatternOriginal price was: $10.00.$9.00Current price is: $9.00.

P.S. I think you’ll love this embroidered star tutorial and this post that shows you several different ways to embroider a sun.


![How Many Strands Of Embroidery Floss To Use [Take The Quiz!]](https://crewelghoul.com/wp-content/uploads/2024/02/how-many-strands-of-floss-to-use.jpg)

