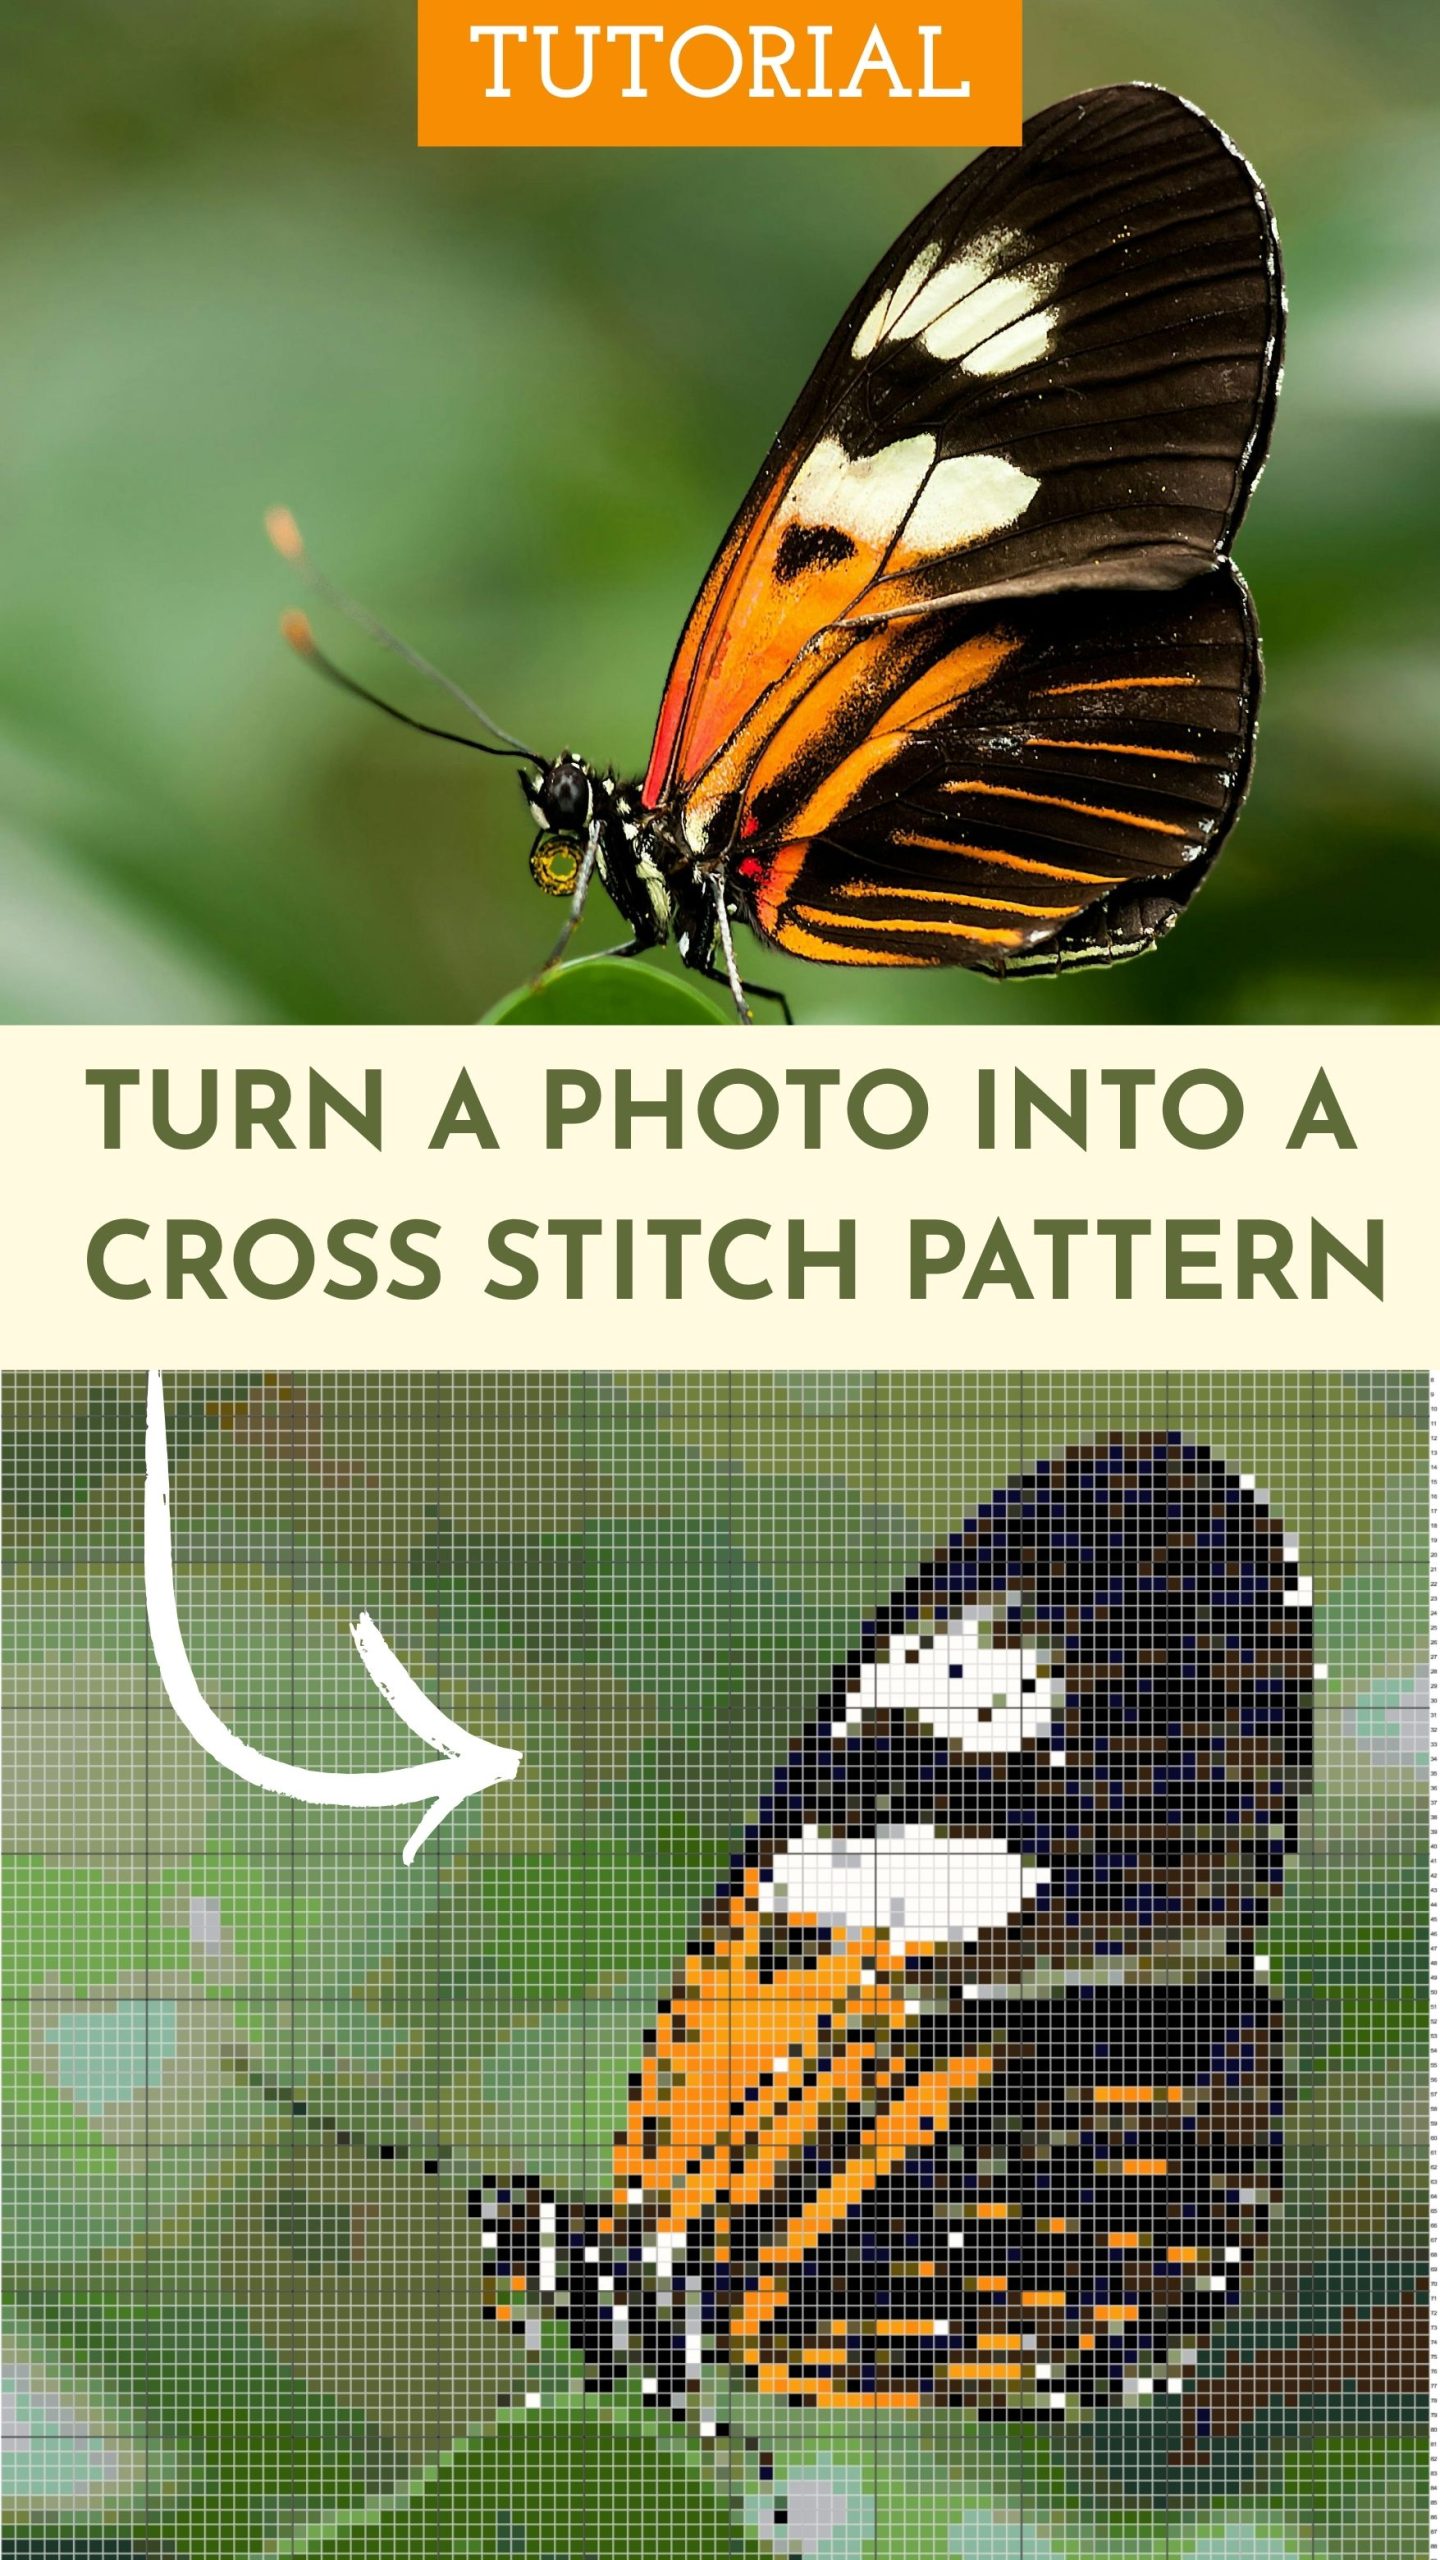
Simple Process To Convert A Photo To A Cross Stitch Pattern
In this tutorial, I will show you a simple and easy process to convert a photo into a cross stitch pattern. Starting off with your own photo is a great way to customize cross stitch projects and it also helps speed up the design process. It can be really hard to make a cross stitch pattern entirely from scratch, so this method is a simple and easy one that I’m sure will help you.
How To Convert A Photo Into A Cross Stitch Pattern
For this particular tutorial I used an application called Stitchly. This app is available on iOs. It does require a one time purchase, but there are also a bunch of free applications available online that are very similar. You can easily use the process I’m about to show you for any application you choose as long as it has the capability to upload photos.
Cross Stitch Pattern Makers
Here are a few pattern makers that work well:
- Stitchly
- Stitch Fiddle – has a free and paid version
- Floss Cross – completely free
I did an in-depth review comparing all of them if you want to learn more.
Upload A Photo
Whether you created your own digital image or you have a specific photo you want to use, the first thing you’ll want to do is upload the photo.

For this tutorial, I uploaded an image file of a simple illustration I made on my iPad. I kept the shapes and colors very basic when I created my design because I wanted to keep the pattern pretty simple. The best results generally come from simpler images.
Here are a few tips for selecting the best photos:
- Select a good quality image that is clear and contains accurate colors of the subject
- If you have an image with a lot of white space around it, be sure to crop this out because the software will generate all of the background into the final design.
- For smaller, less detailed designs, choose simpler images
- Always make sure the image you are using is not copyrighted!

Once the photo is uploaded, there will be a a preview of what the generated pattern will look like. At this point, you’ll need to choose the fabric count you plan to use as well as the desired size of the finished piece.
Tip: If you uploaded an image with a white background that you don’t want to stitch, make sure to select the option for a transparent background or remove the color entirely!
There may also be an option to select the number of colors for the pattern. Photo generators generally pull a lot of different colors, so I normally decrease the number until I start to see the detail of the pattern substantially decrease.
Sizing The Pattern

More detailed images will require a greater number of stitches, so the finished design will most likely need to be larger. Another possible way to add in more detail but also keep the dimensions smaller is to use a higher fabric thread count.
For example, if you’re using 14 count fabric, the design will need to be larger to include a good amount of detail. (For my particular design, 11 x 7 inches.) The same design and level of detail on 24 count fabric would only have to be 6.4 x 4 inches
Play around with the thread count, colors, and stitch count until the preview is as close to the photo as possible. But don’t worry, this won’t be the finished design. It will need to be refined quite a bit more before you can use it!
Refining The Design

At this point, you’ll have a rough draft of a pattern. Now it’s time to go in and refine the design a bit. Depending on the level of detail and the quality of the photo, there will be some randoms spots of color that may need to be removed or modified.
Select the floss palette which will show you all of the embroidery floss colors that make up the pattern. Select colors and modify them as needed until you’re happy with the pattern. You can do this stitch by stitch or by entirely replacing or removing particular colors.

Most pattern makers will show you a list of all of the thread colors that are used in the pattern. Make sure to look through this list, adding and removing unnecessary colors. Sometimes it can be hard to tell just by looking at the colors in the cross stitch chart, so this is an easy way to double check that you’ve corrected all the colors you want to.
Export The Pattern
Once you’re happy with you’re pattern, it’s time to export it! There are a variety of formats available, but the easiest way to make it printable is to download it as a PDF file.