
How To Embroider A Spider and Spiderweb
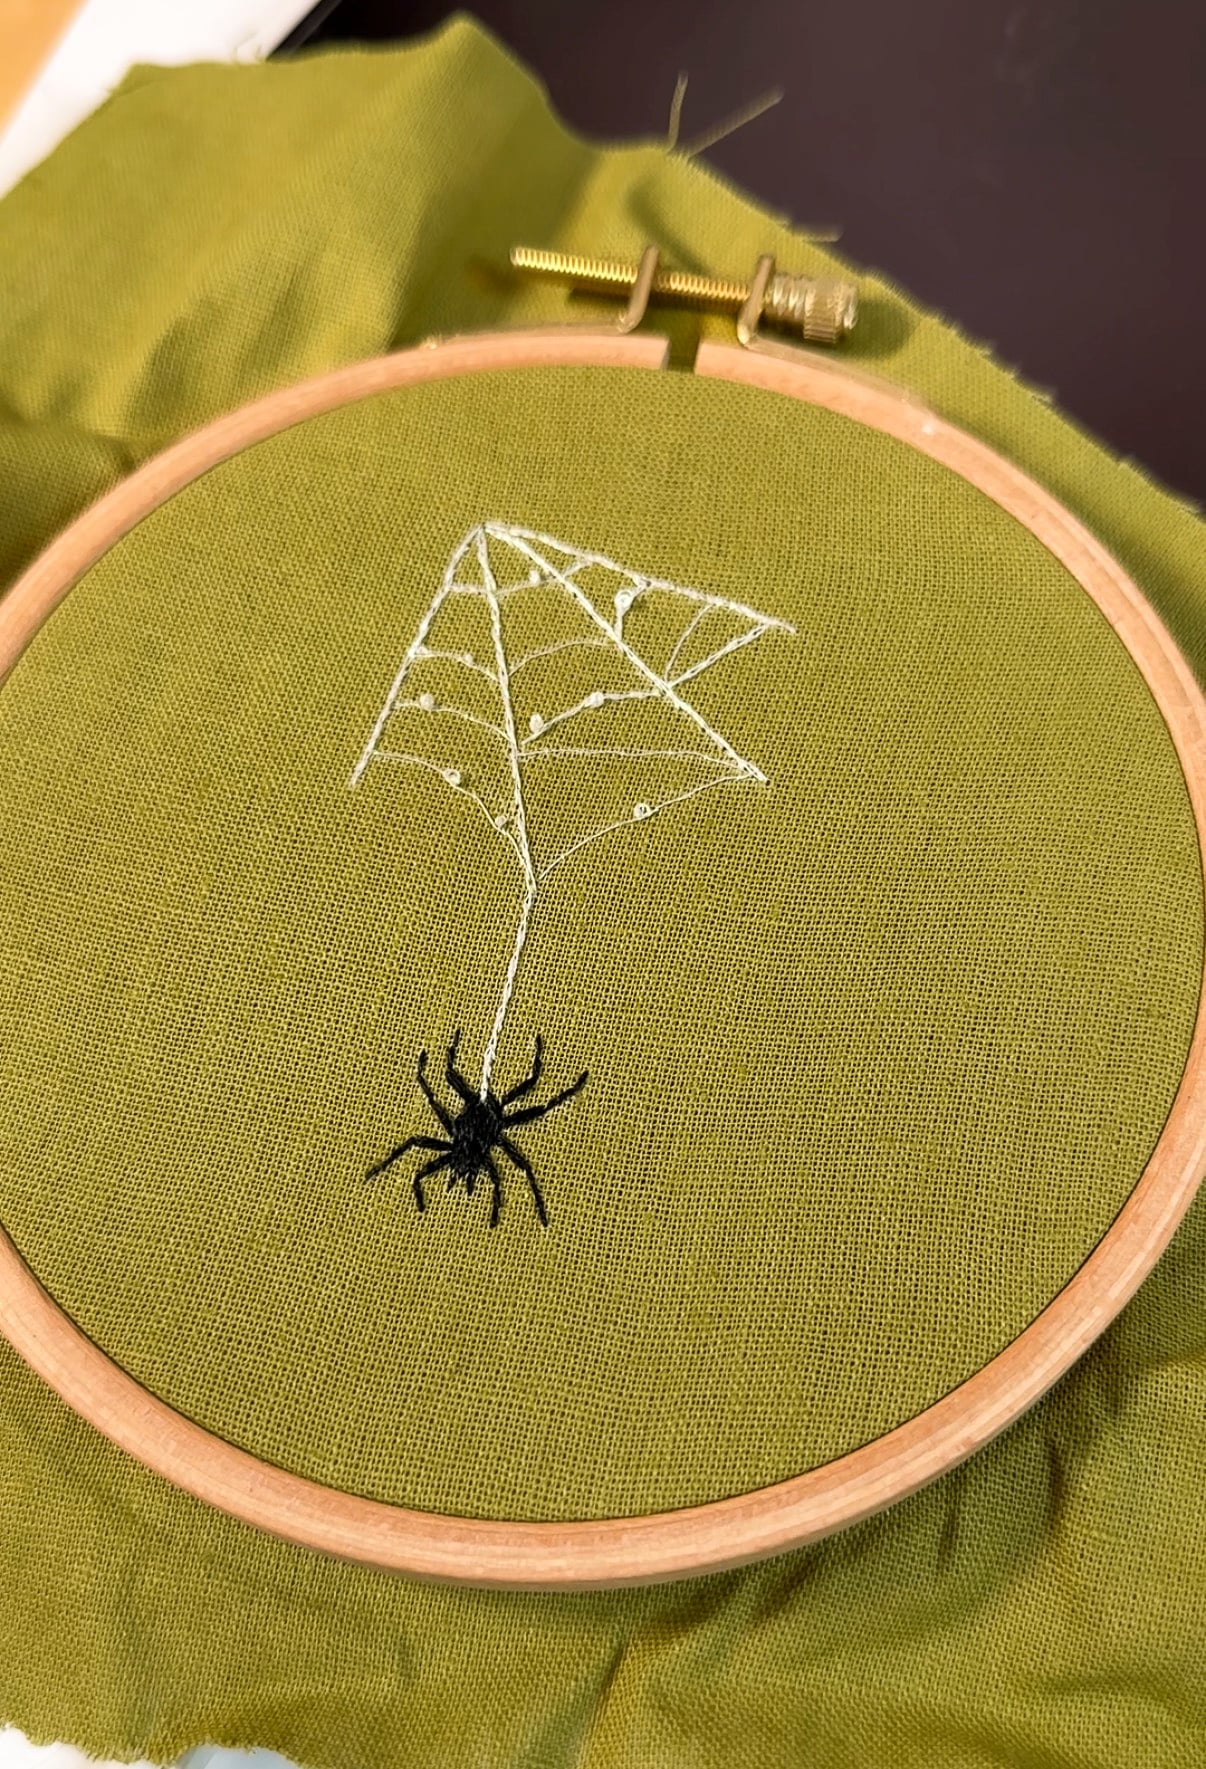
As I am writing this, the Halloween season is fast approaching. Whether you’re looking to get into the spirit of the season or you’re just generally curious about how to embroider a spider and a web, this tutorial is a simple and interesting one!
Disclaimer: This post contains affiliate links, which means I may earn a small commission if you choose to purchase an item.
Spider Spinning a Web Embroidery Tutorial
Supplies Needed
You’ll need the usual embroidery supplies for this tutorial, plus a few special items that will make stitching the web a little easier.
- DMC Diamant (Amazon), Floche (DMC.com), or stranded cotton floss for the web – (I used Diamant D5200)
- Black or grey stranded cotton floss for the spider
- White Clover transfer pen (Amazon) /or Bohin extra-fine chalk pencil (Amazon) – I like to have both available.
- Dark cotton or linen fabric
- Embroidery needles, size 9
- 5-inch embroidery hoop
- Grab my free printable spiderweb designs here
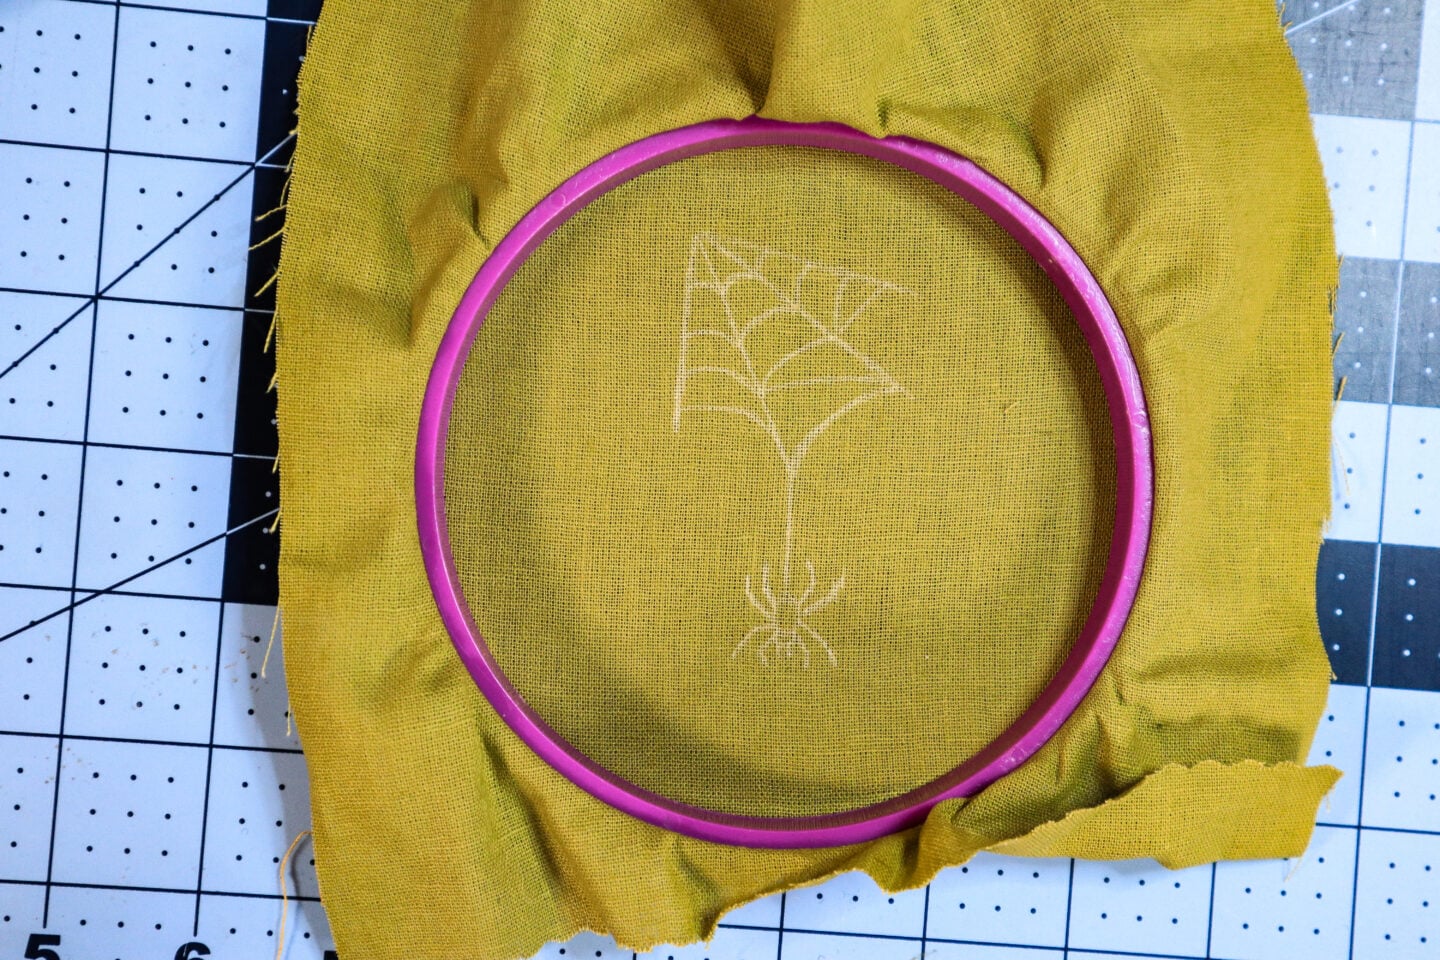
Transferring the design
Using a light source, trace the design onto the fabric. If you have both white transfer pens available, you can do the initial trace with the chalk pencil, then go back over it with the white Clover pen to help it stay in place. (The Clover pencil takes a moment to show up, so it’s more challenging to transfer with initially.)
Stitching The Web
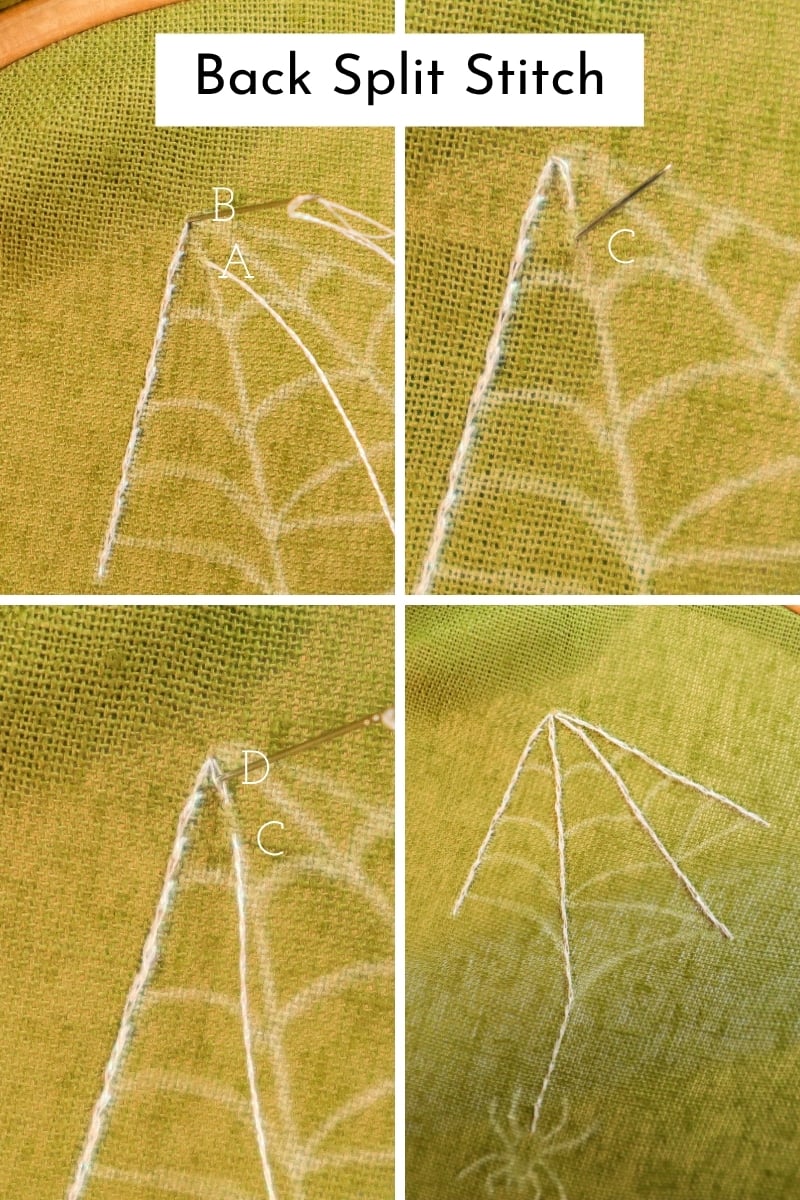
You can use any outline stitches you want, but I prefer to use the split stitch and the couching stitch. Both of these create seamless, textured lines that work well for the web.
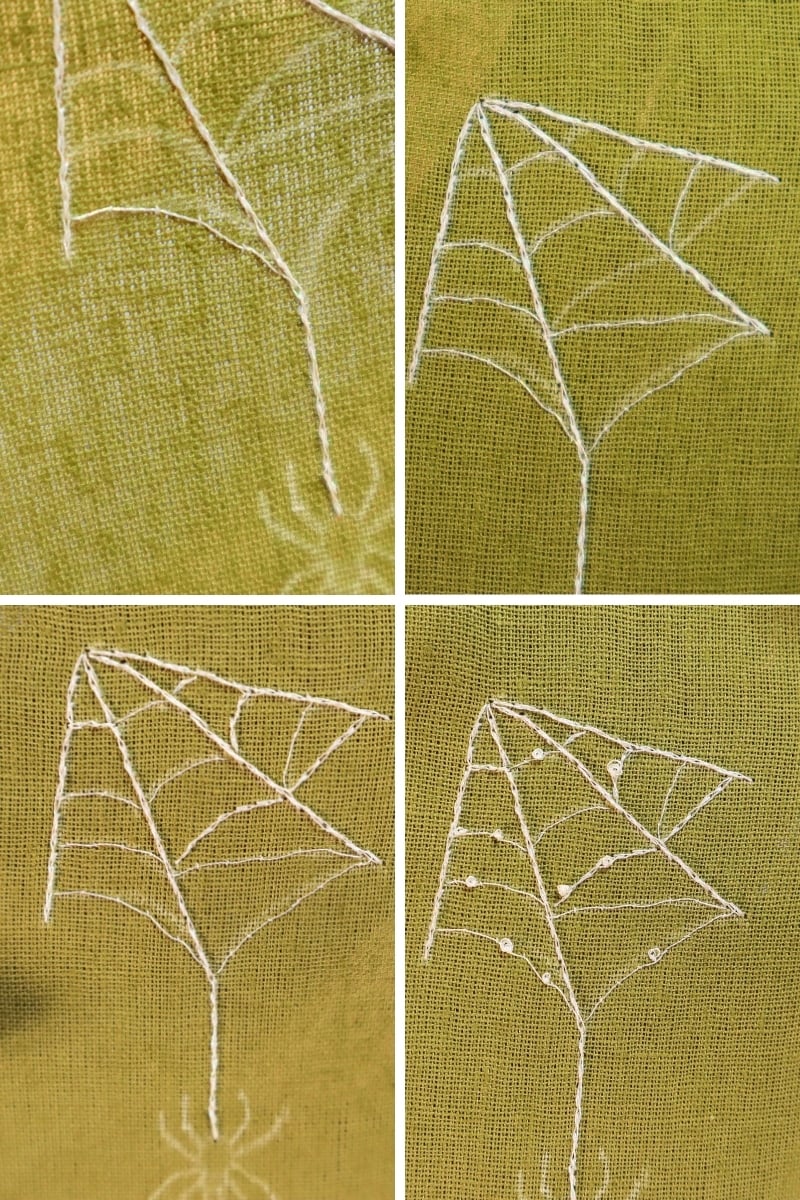
Using the Diamant thread, I split-stitched along the straight lines using two strands of thread. The easiest way to split stitch on such a thin piece of thread is to make a back split stitch (where you split the stitch as you go down through the fabric instead of up)
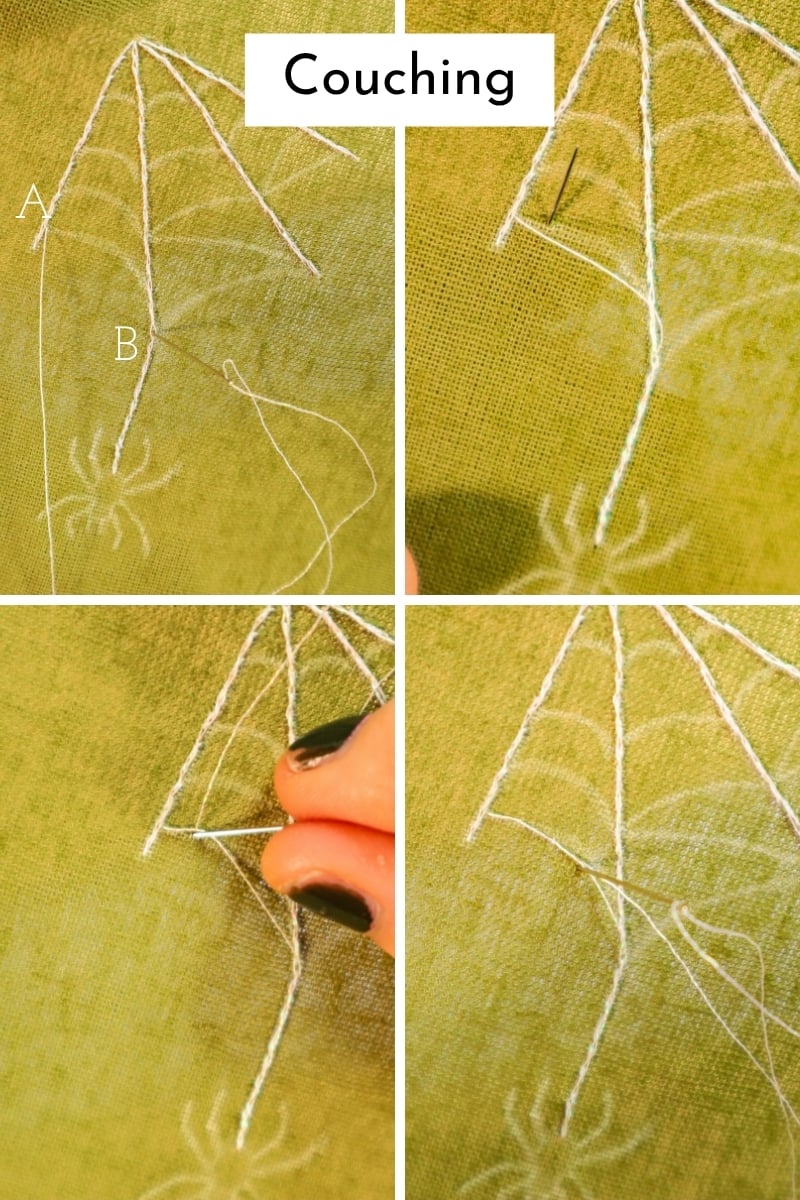
Next, I used one strand of the Diamant thread and embroidered some of the curved lines with couching stitches. I left a few unstitched because I wanted to add more variation in the thickness of some of the lines.
Then I went back in with two strands of Diamant and split stitched the remaining parts of the web.
An optional step is to add dew along the web. Use 2 strands of Diamant floss and make 1-3 wraps around the needle. I used different numbers of wraps so there was a good variety in the size of the dew along the web.
Embroidering the Spider
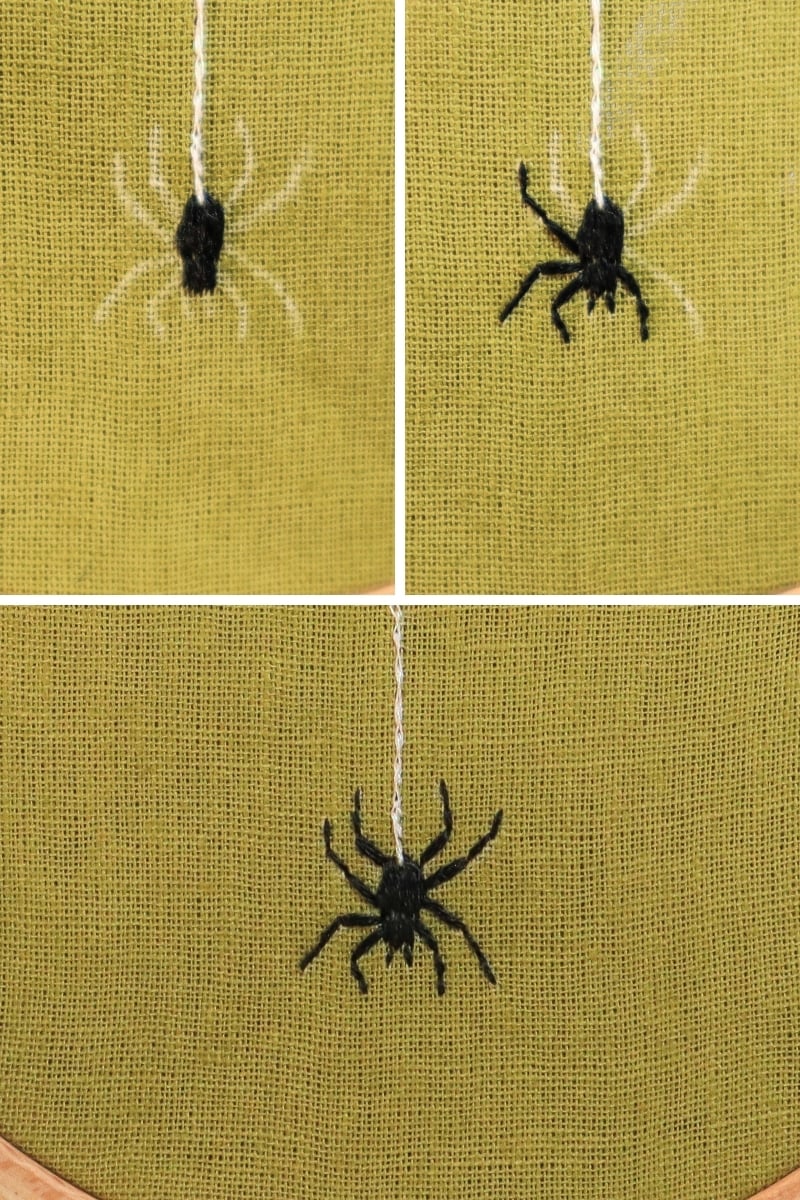
I used a mixture of long and short stitches and satin stitches for the spider’s body.
Then for the pincers, I made two little straight stitches.
I made 3 back stitches for each leg, essentially stitching along each joint. To make them look more realistic, I added a second stitch along the joint closest to the body.
Video Tutorial

And that was it! Pretty simple, right? You can experiment with different stitches, materials, and threads to create fun effects, but the principles remain the same.
Hope you found this helpful. Happy spooky season!
Want to keep stitching? You’ll love this roundup of insect embroidery patterns to stitch.


![16 Flower Embroidery Patterns [5 That Are Free!]](https://crewelghoul.com/wp-content/uploads/2019/03/ACS_0084-768x1024.jpg)
![Mixed Media Watercolor Embroidery Project -[Free Online Class]](https://crewelghoul.com/wp-content/uploads/2020/07/watercolor-embroidery-mixed-media-project.jpg)