Learn The Cretan Stitch – Interactive Embroidery Tutorial
One of my favorite things to do is peruse my vintage embroidery books in search of interesting embroidery stitches to learn. And let me tell you: there are so many that it feels like I’ve barely scratched the surface! One stitch I came across a few years ago that was rather intriguing to me was the Cretan stitch.
It’s intricate and admittedly a bit intimidating at first glance. (It reminds me of fond memories of horseback riding, as it resembles a braided horse tail!) But you will see that the steps to create it are simple.
Today, we’re going to explore the Cretan stitch in all its marvelous forms. I’ll show you the basics of how to work it, as well as some techniques and variations, to help you understand exactly what is going on with this fun little stitch so you can shape it and use it to your liking.

Cretan Stitch Tutorial
The Cretan stitch can be used for borders or for filling in shapes. It’s one of those stitches that can look very different depending on the spacing and angle at which you work it.
Depending on the effect you’d like to create, you can achieve a more open or closed fill. When stitched more spaced out, this stitch looks similar to a ladder, with interior stitches that zigzag. When the stitches are made close together, the center line has a plaited or braided appearance.
Getting Started
First, let’s go over how to do a basic Cretan stitch without any frills. I highly recommend marking the fabric for this stitch. It’s tough to keep the stitches even without some guidance!
Draw four evenly spaced vertical lines on the fabric before starting. (You can also print out this sampler design and follow along with all of the examples!)
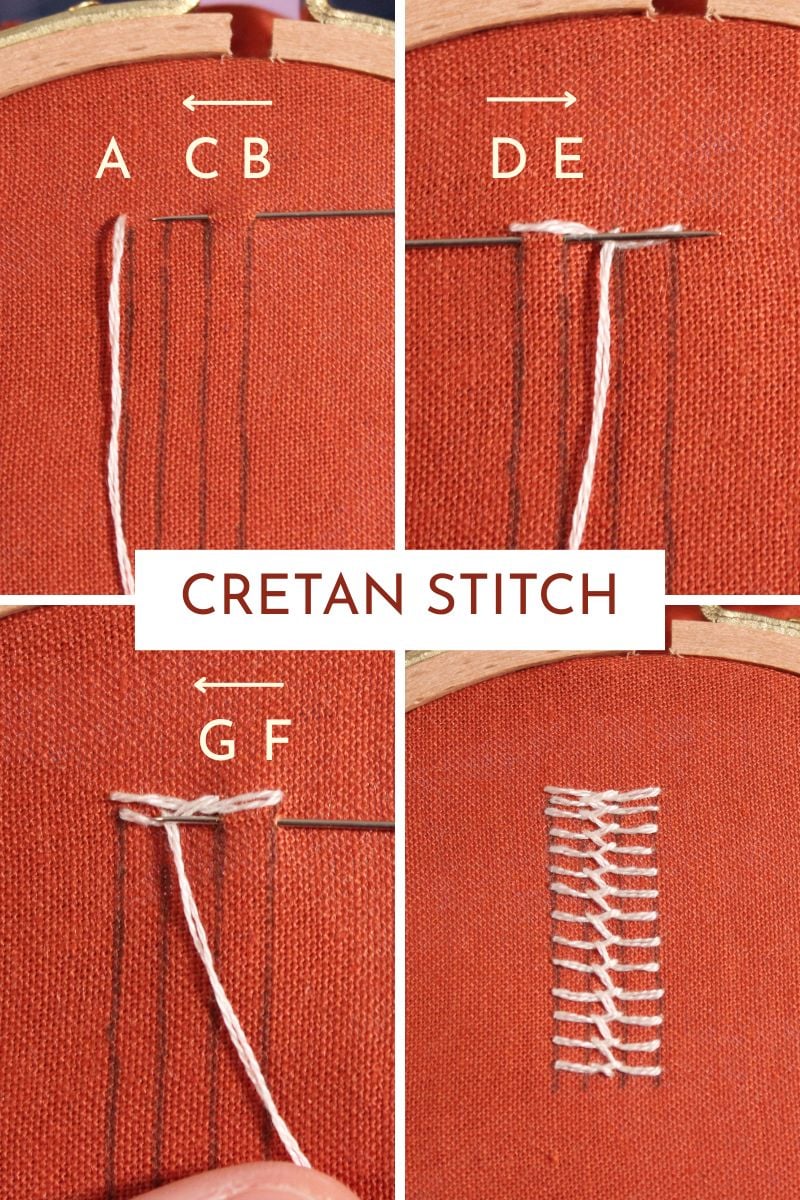
Basic Cretan Stitch
- Come up at A and then grab the fabric with your needle from right to left at B and C. Pull the thread through.
- Place the needle through the fabric from left to right at D and E. Keep the working thread underneath the needle and pull the thread through.
- Place the needle through the fabric from right to left at F and G. Again, ensure the working thread is underneath the needle, then pull the thread through.
- Continue alternating all the way down until the shape is filled in.
Variations
Closed Cretan Stitch

The first example’s stitches were more spaced out to make it easier to see what was happening. To achieve a more solid fill, you can make the stitches closer together. All you have to do is make each stitch directly below the last.
Diagonal Cretan Stitch
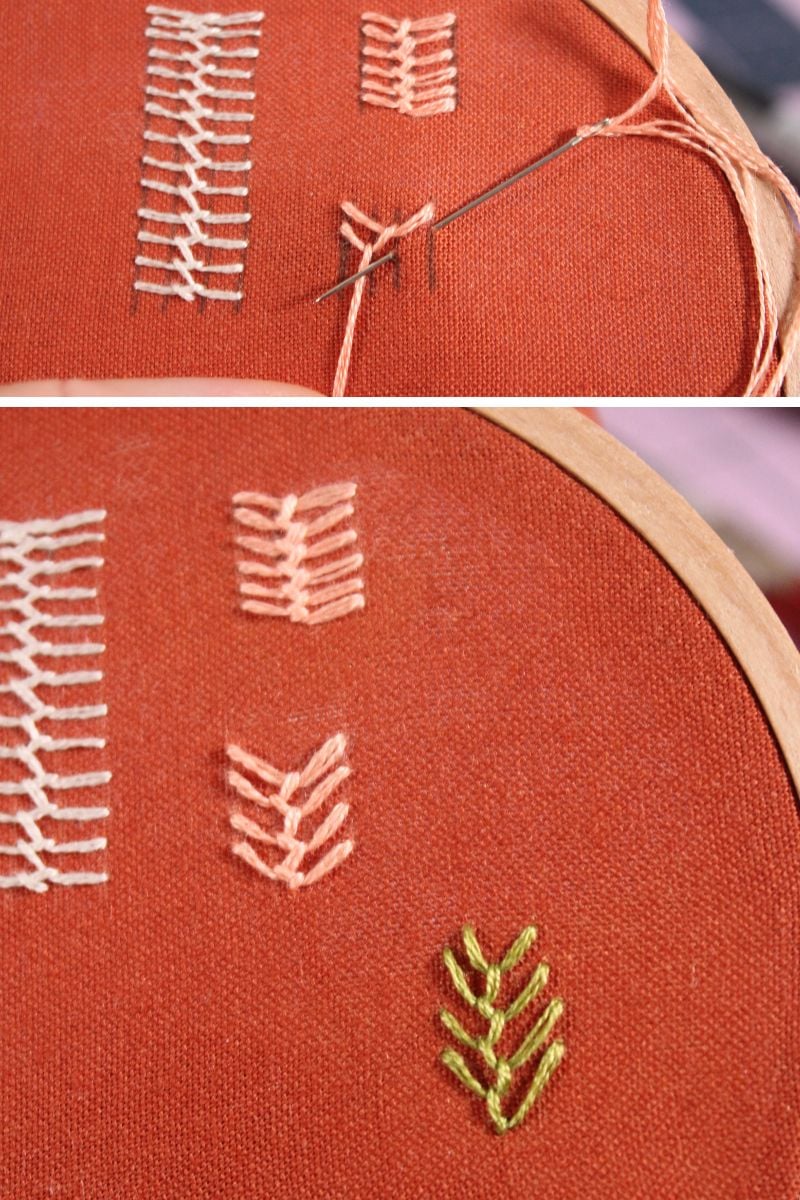
The stitches can also be worked along an angle instead of straight across to change the appearance of this stitch even more. (The fishbone pictured in the photo at the top of this post uses this variation!)
Start by making B and C at a diagonal, and then make all of the subsequent stitches along a similar angle.
If this variation of the stitch feels reminiscent of a feather stitch, that’s because it has similar properties! In fact, another name for this stitch is the “long-armed feather stitch.
Cretan Stitch Leaf
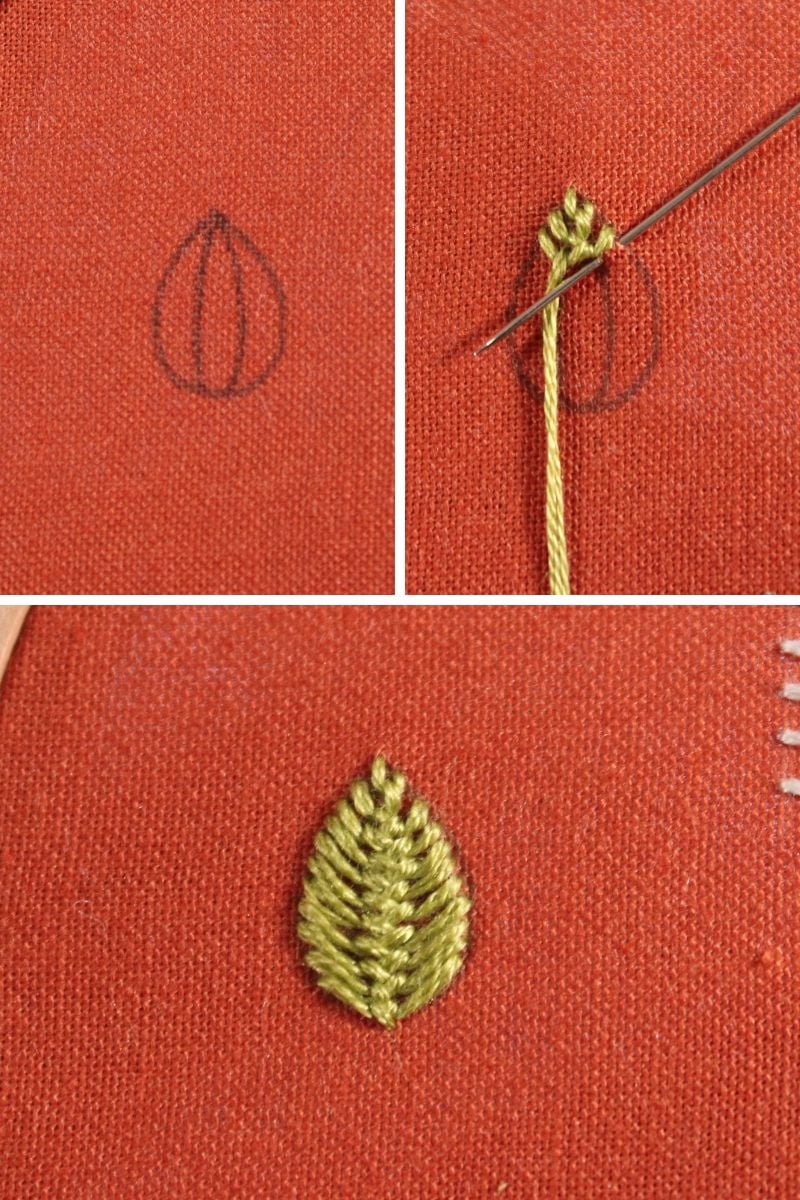
To make a Cretan stitch leaf, work the stitches close together and at a diagonal. Start at the very top and work your way down along the shape, making sure the stitches end along the edge of the shape. I find it helpful to draw the shape of a leaf and then draw two lines down the middle to guide my stitches.
The Many Appearances Of The Cretan Stitch
Another thing you can play around with is the space between each of the marked lines. You could mark the fabric so that the space between lines 2 and 3 is wider and the space between lines 1 and 2, 3 and 4 is smaller, so the center stitches are more prominent and the “legs” of the stitches are shorter.
The plait or braid that forms along the two center lines can be manipulated depending on how spaced out the stitches are and how far apart the 2 center lines are.
Are you starting to get the hang of this stitch yet? It’s really fun to practice, so keep working at it. I think you’ll find that it’s one you can utilize in a lot of different ways!
<< Back To All Embroidery Stitches


