Easy Feather Stitch Embroidery Tutorial
The feather stitch is a decorative, open-fill embroidery stitch that resembles scales, feathers, stems, and vines. Usually worked from top to bottom, a series of interconnected stitches creates zigzagged “V” shapes.
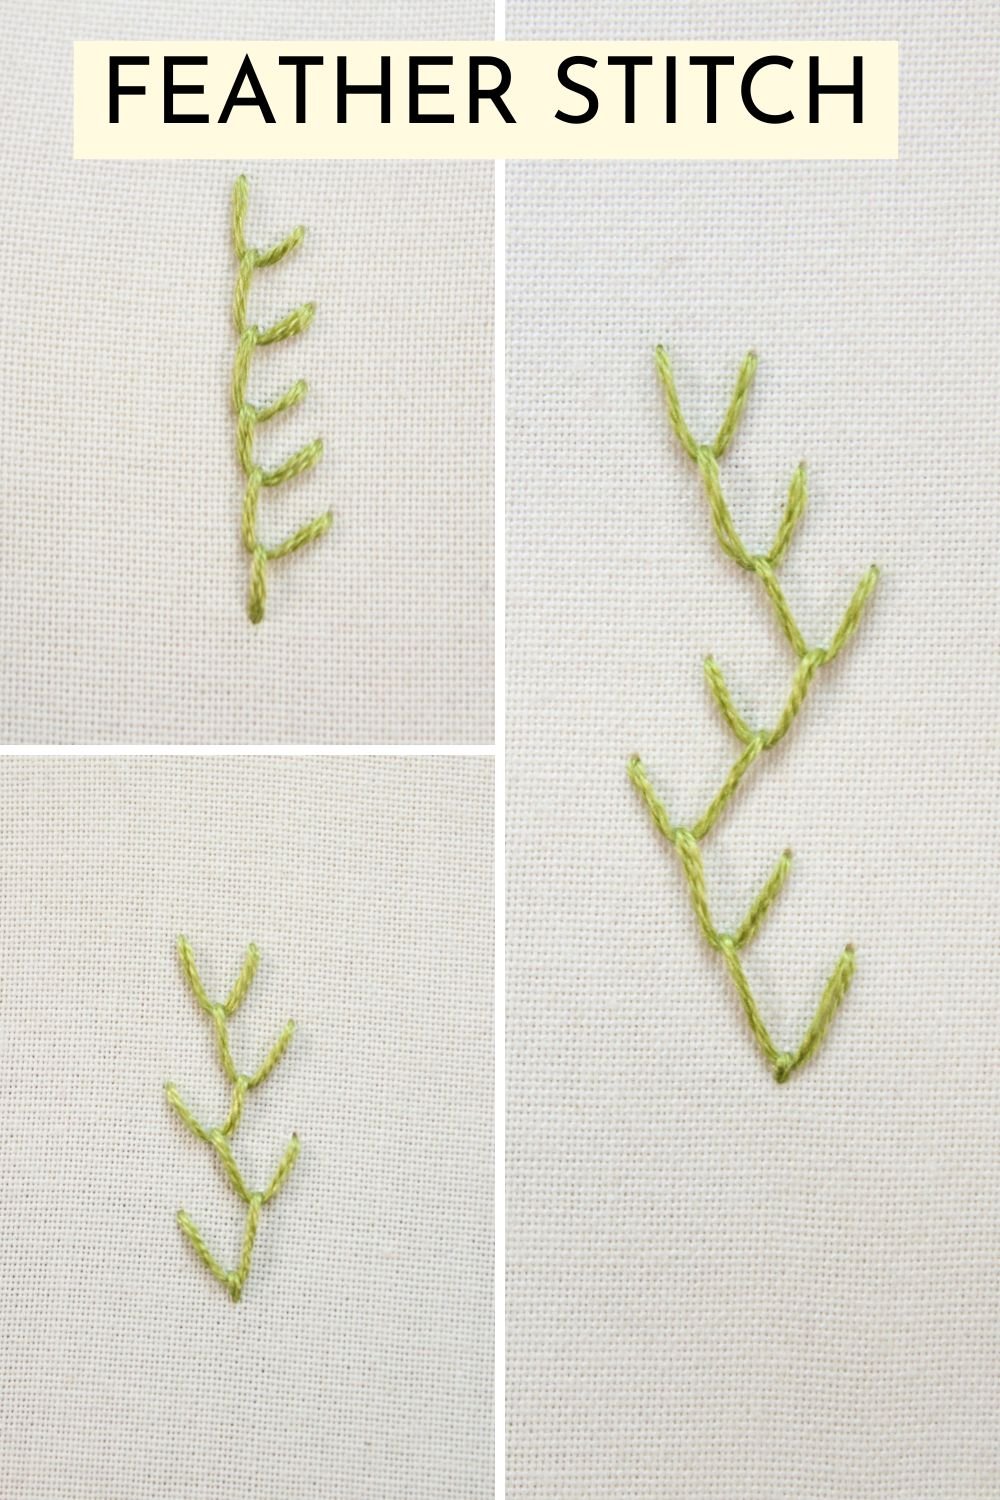
Single Feather Stitch
Let’s start with a single row of interlinked feather stitches. This is an easy stitch to learn, and it’s even easier if you’re familiar with the fly stitch, the Cretan stitch, or the blanket stitch, because it has a very similar execution.
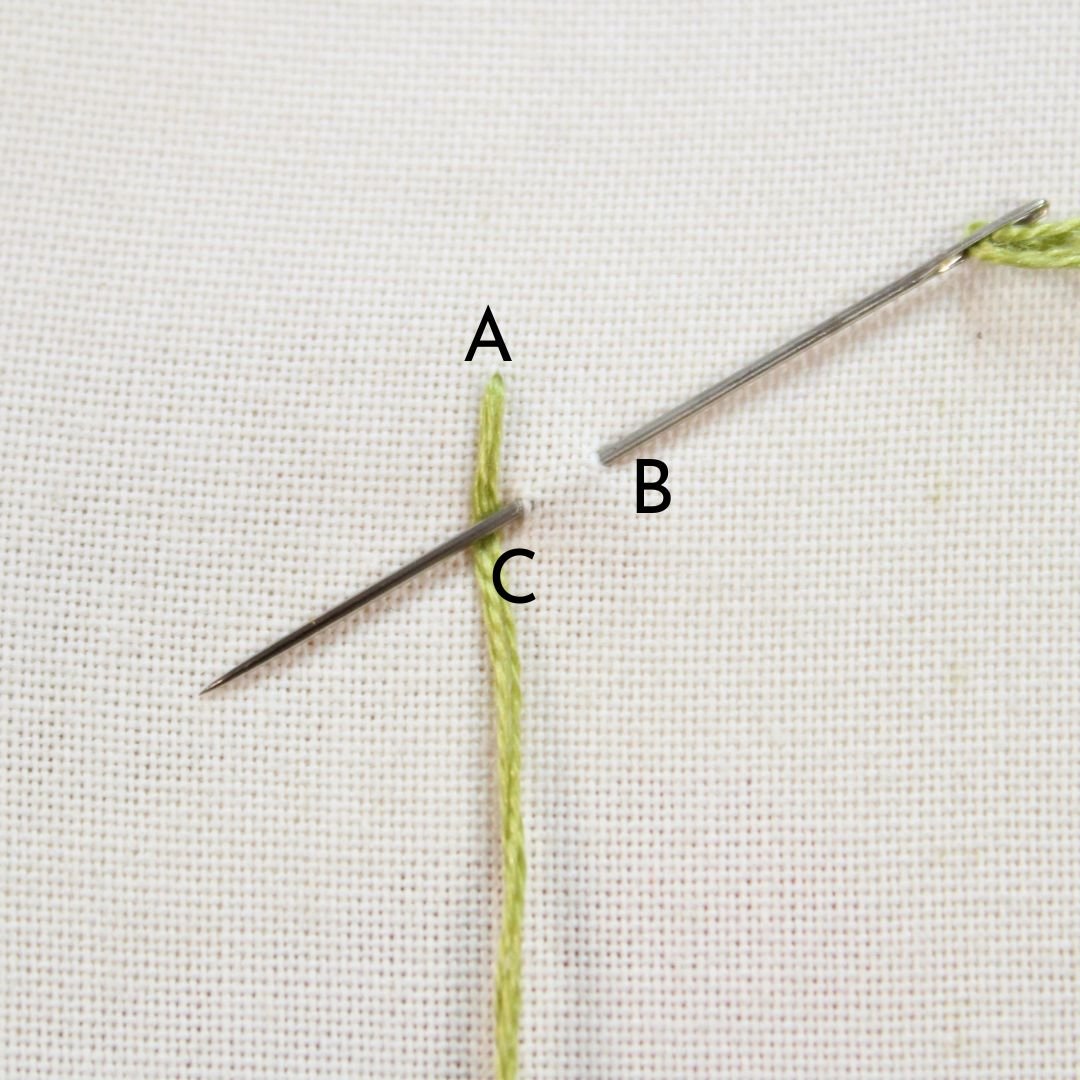
Come up through the fabric at A with your needle and thread. Take the needle slightly below and off to the right, piercing the fabric at B and emerging at C, which should be below and in line with A.
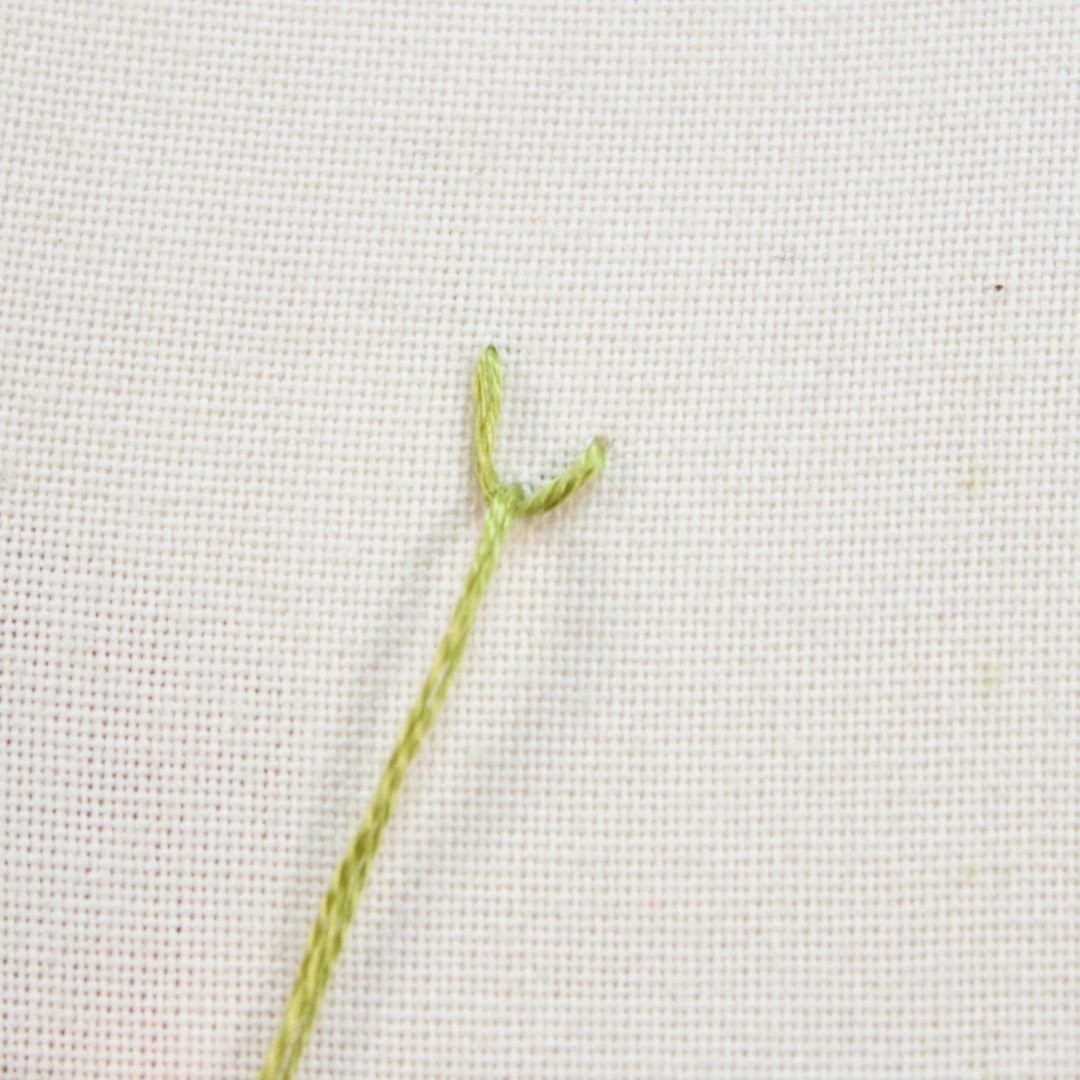
Make sure the needle is over the working thread, then pull the needle and thread through the fabric so a small, slightly slanted V shape forms.
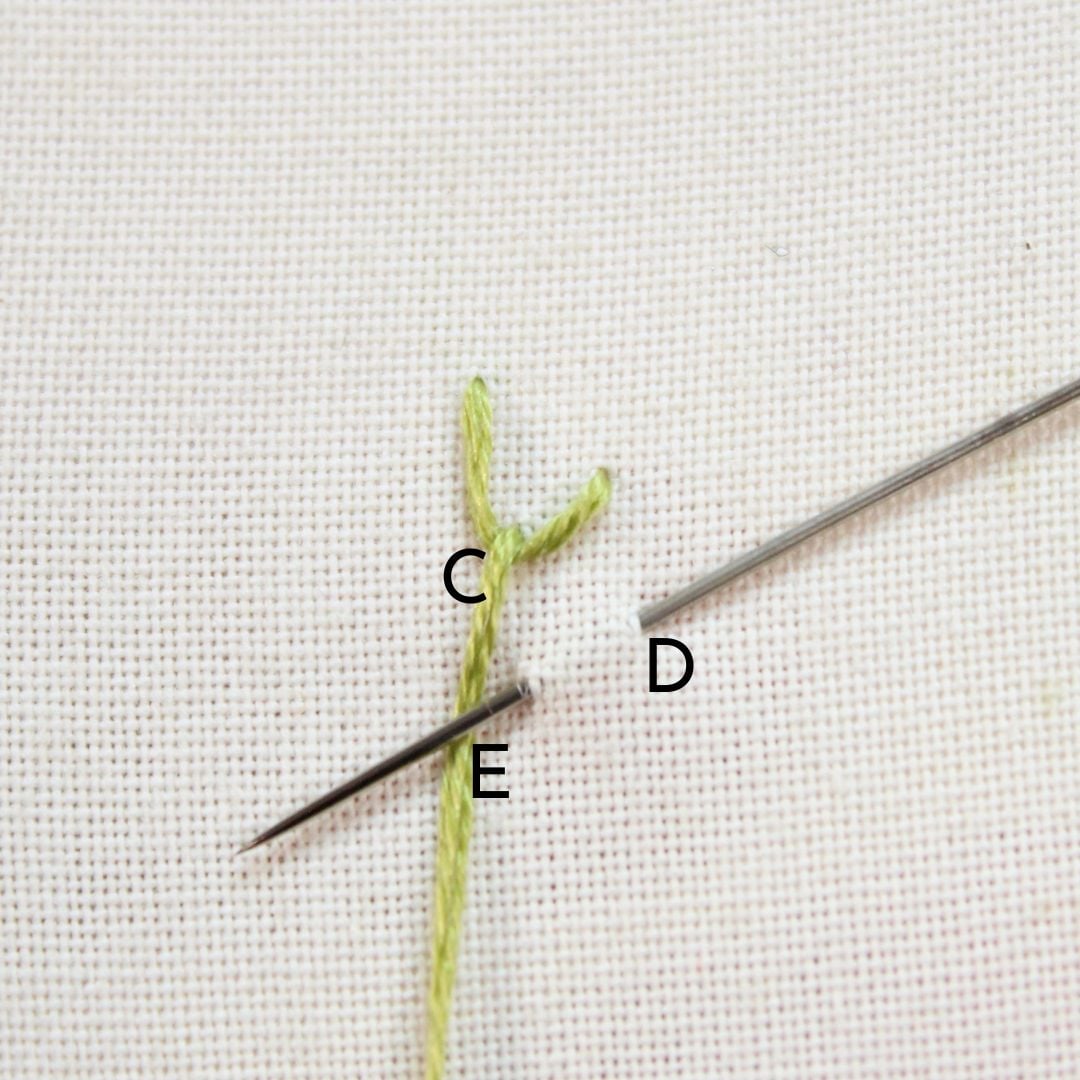
Bring the needle through the fabric at D, in line with the leg of the stitch above. Then emerge to the surface of the fabric at E, which should be aligned with C.
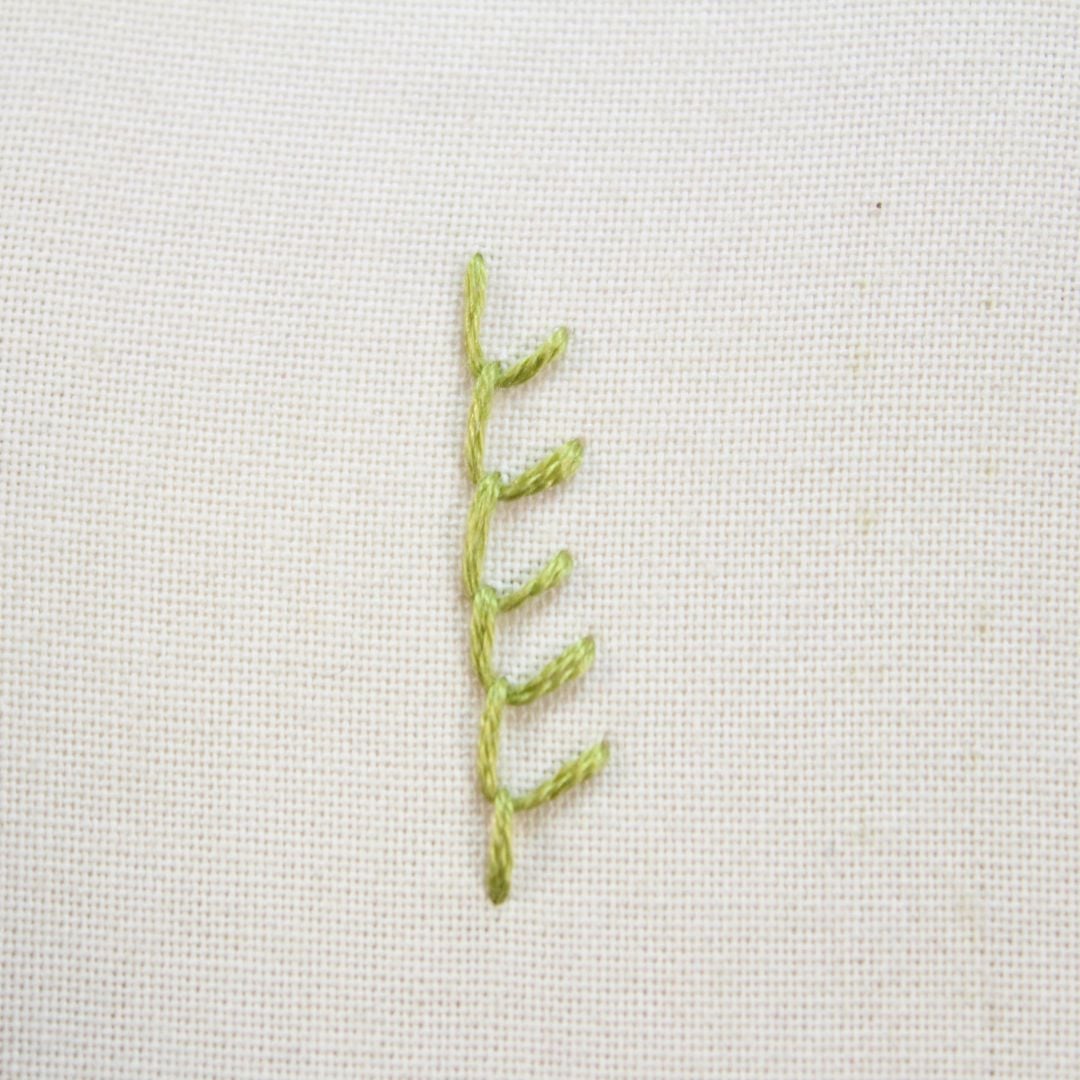
Repeat these stitches along the line for the desired length.
If you flip this line of stitches 90 degrees, you’ll notice they look very similar to blanket stitches, but at a slight diagonal. Neat right?
The Double and Triple Feather Stitch
The most common use for this stitch is to stagger them, working across multiple columns. If you find it helpful, you can draw lines on the fabric to mark where you should place the stitches, but it isn’t necessary.
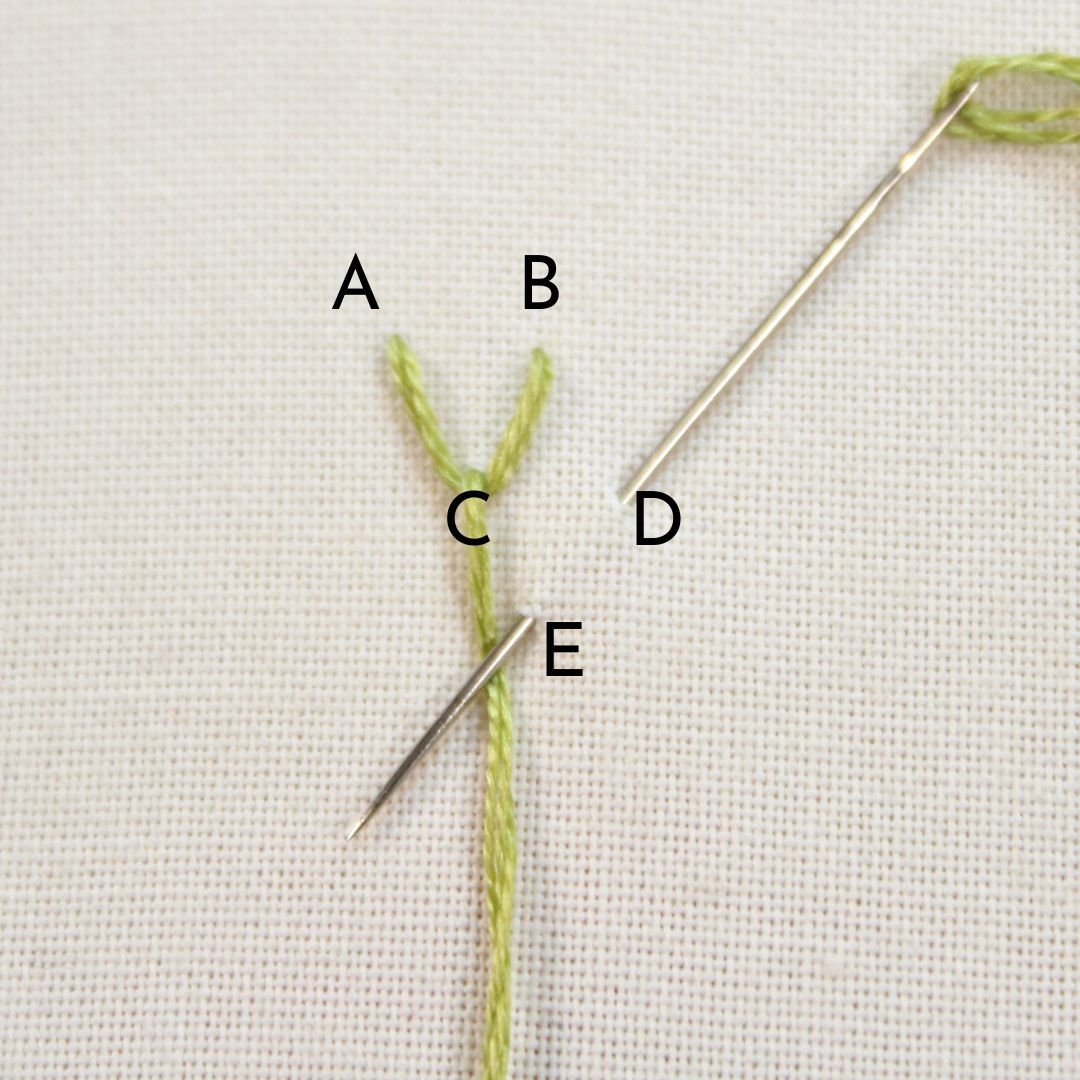
First, make a single feather stitch. Then make the next stitch off to the side. Place the needle at the same level as C with some space between, then emerge through the fabric with your needle in the middle of C and D at E.
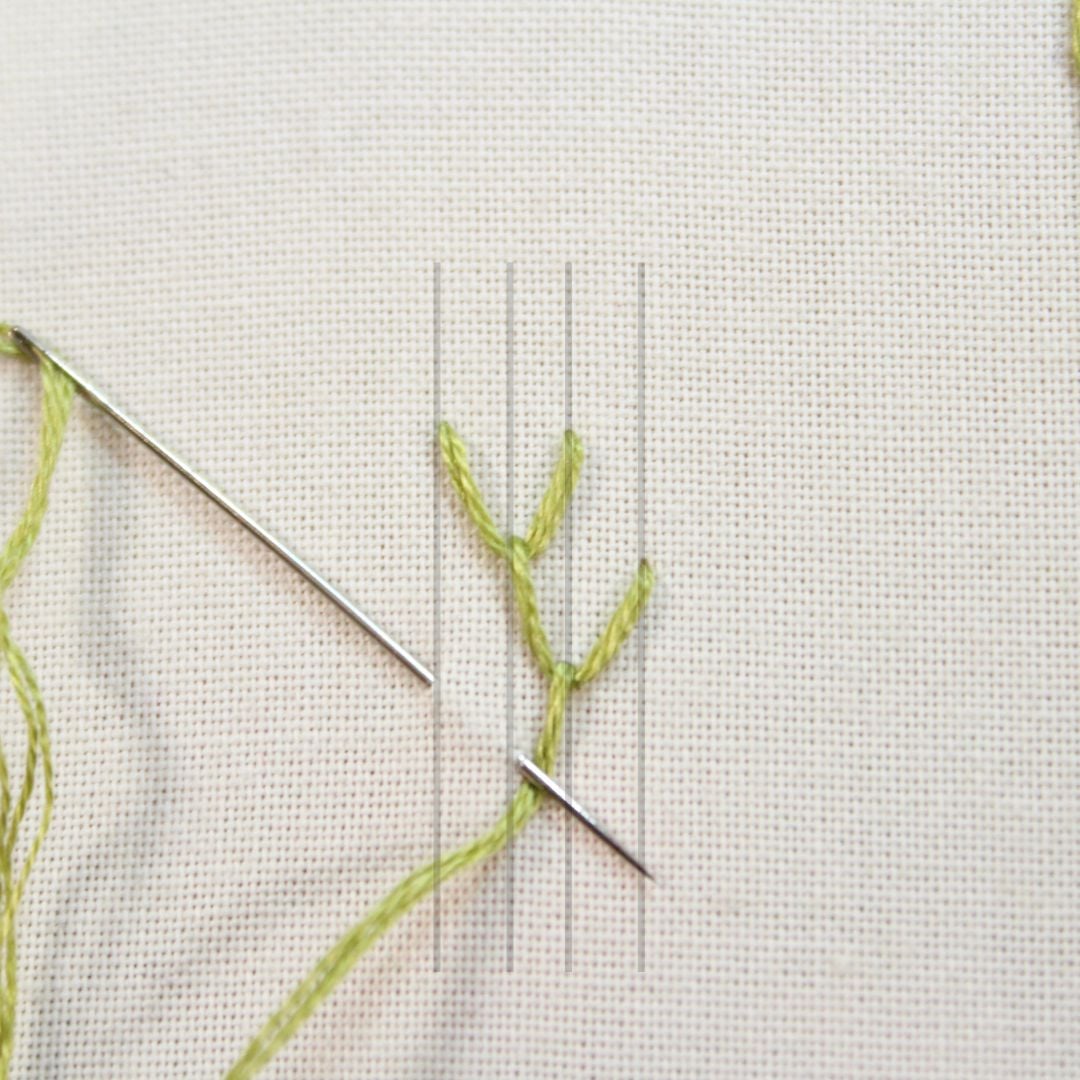
For the third stitch, make it below the second stitch, and in line with the first.
Continue alternating to the left and right for the desired length.

To make a triple feather stitch, you would just work the first stitch, then two stitches to the right, two stitches to the left, etc.
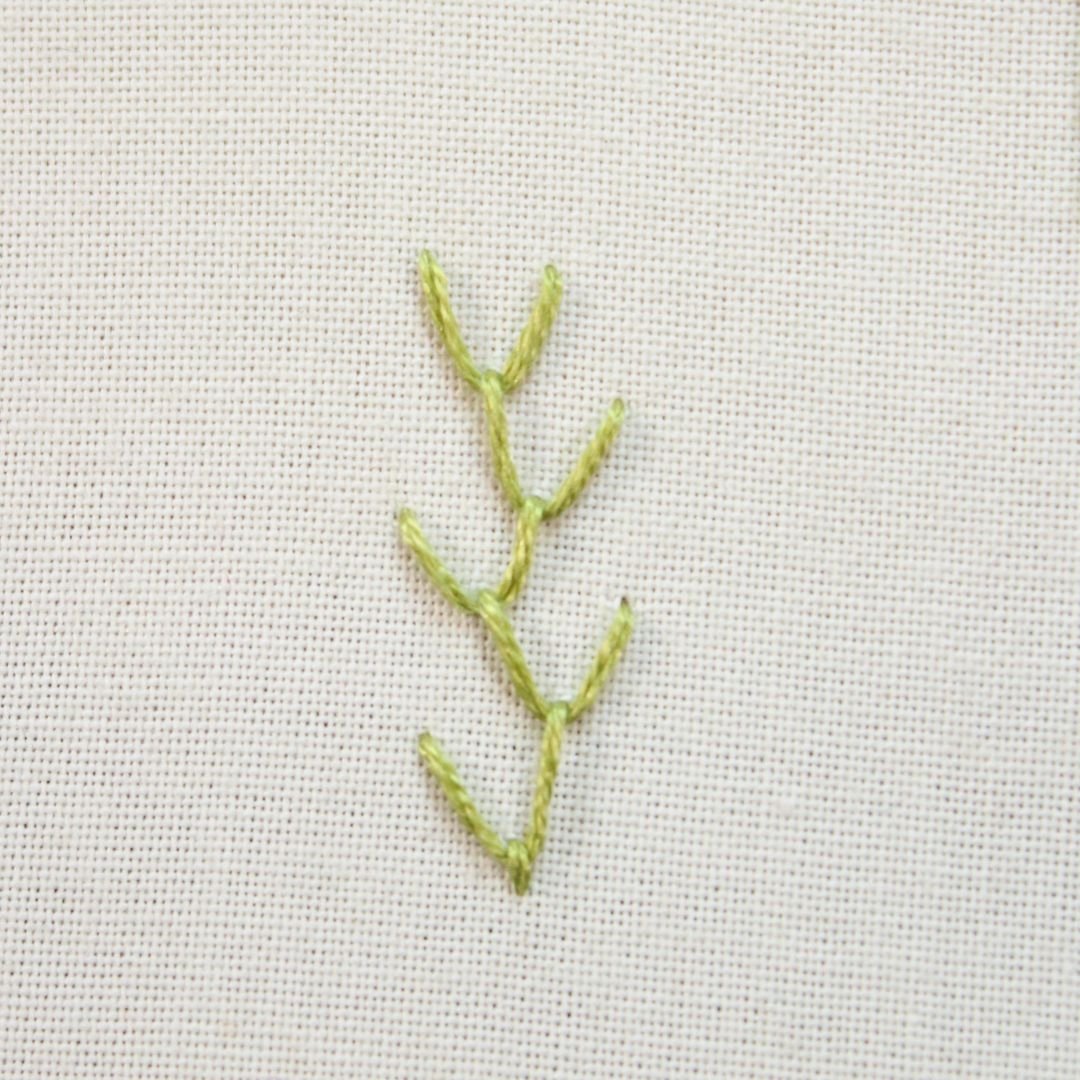
Embroidering A Branch
Once you understand the pattern in which to execute this stitch, you can become less prescriptive and more loose with it. It’s easy to stitch organic shapes, such as a vine or branch.

- Make a line of feather stitches that gently curve. For this example, I used a combination of single and double feather stitches.
- Then make another line of feather stitches, connecting them to the first line near the base.
And that’s it! You’ve now learned some of the most common types of feather stitch variations, but I recommend you learn one more: check out this closed feather stitch tutorial next.