How To Cross Stitch Neatly (Tips That Make A Huge Difference)
Have you ever been deep into a project and noticed that your stitches look slightly off? It’s the most discouraging feeling; I’ve been there more than once.
But don’t worry! These tips will help you cross stitch neatly and are surprisingly easy to implement. You’ll learn how to improve the front and the back of your work, and it won’t take long to notice an improvement.

Disclaimer: This post contains affiliate links, which means I may earn a small commission if you choose to purchase an item.
Keeping Cross Stitch Neat On the Front
Secure Your Thread
When you start a stitch, it’s helpful to anchor your thread. That way, the first few cross stitches you make won’t become loose.
- Cut a long strand of thread and fold it in half.
- Thread the end with the two separate strands onto the needle. (The looped end should be at the very end of your thread.)
- Make a stitch, leaving a tail. When you bring the needle and thread to the back of the fabric, place your needle through the loop and pull tight.

Use The Railroad Technique
Sometimes, after you’ve been stitching for a while, the thread can get twisted up, causing it not to lay as flat.
Cross stitch railroading will help untwist the threads. This technique involves separating the two strands of floss with your needle as you make each stitch. It takes more time, but that’s what it takes sometimes to get your work looking neater.
Use 2 Strands Of Thread
I think using two strands of floss looks best for cross stitch. I’ve tried using three strands in the past, but it was harder to control how the individual stitches lay, and the overall appearance of my work was fluffy and messy.
On the other hand, using one strand at a time, especially on 14 or 16 count Aida, results in a lot of the background fabric showing through, which no one wants!

Stitch Direction
The order in which you make each cross stitch should be the same throughout the project. This will help the stitches to look cleaner and more uniform.
You can work each cross stitch one at a time, but it can be easy to forget which order you make the stitches.
When you have multiple stitches to fill in using a particular color, the easiest way to ensure your stitches go in the same direction is to use the Danish method of stitching: make half stitches (diagonal stitches) in a specific column or row, then go back down the row, making the other half of the cross stitch to complete it.
Start In An Empty Hole
Wherever possible, start your stitches in an empty hole. Beginning in the hole that already has a stitch can split the threads and disrupt surrounding stitches.
Use A Laying Tool
Try using a laying tool. This tool will help you control the tension of the threads and prevent them from twisting over one another. So essentially, they will lay more flat!
Stabbing vs Sewing Technique
Your technique can also affect your stitches.
There are generally two different techniques for to cross stitching: stabbing and sewing. Using the stabbing technique, you usually go up and down through each hole in the fabric. On the other hand, sewing involves working mainly from the front of the fabric, grabbing the fabric with your needle, and going through two holes at a time.
When I use the stabbing technique, I feel I have more control over the thread tension and how each thread lays. It’s slower but worth it if you want perfect looking stitches!
This is just my preference: I recommend trying both techniques to see which one you like the best.

Keep The Fabric Tight
If you work in hand, this tip will not apply to you. However, if you’re using a hoop or scroll frame, keep the fabric tight, which will help you get perfect tension in your stitches.
Untwist The Thread
Sometimes, the motion of stitching can cause the thread to start twisting upon itself. When this happens, let the needle and thread dangle so it can untwist. Untwisting the thread now and then will help prevent knots and the threads from twisting as you stitch, resulting in flatter, neater stitches.
Use Thread Conditioner
Using some beeswax or thread conditioner will keep the strands together as you stitch and it can help prevent twists and tangles. The tradeoff with using this is that it dulls the sheen of the thread a little bit, but it does keep some of the fuzziness under control. Try it out; some people swear by it!

How To Keep The Back Of Cross Stitch Neat
The back of your work is as important as the front. Here’s how to keep things tidy so you don’t have an unruly mess!
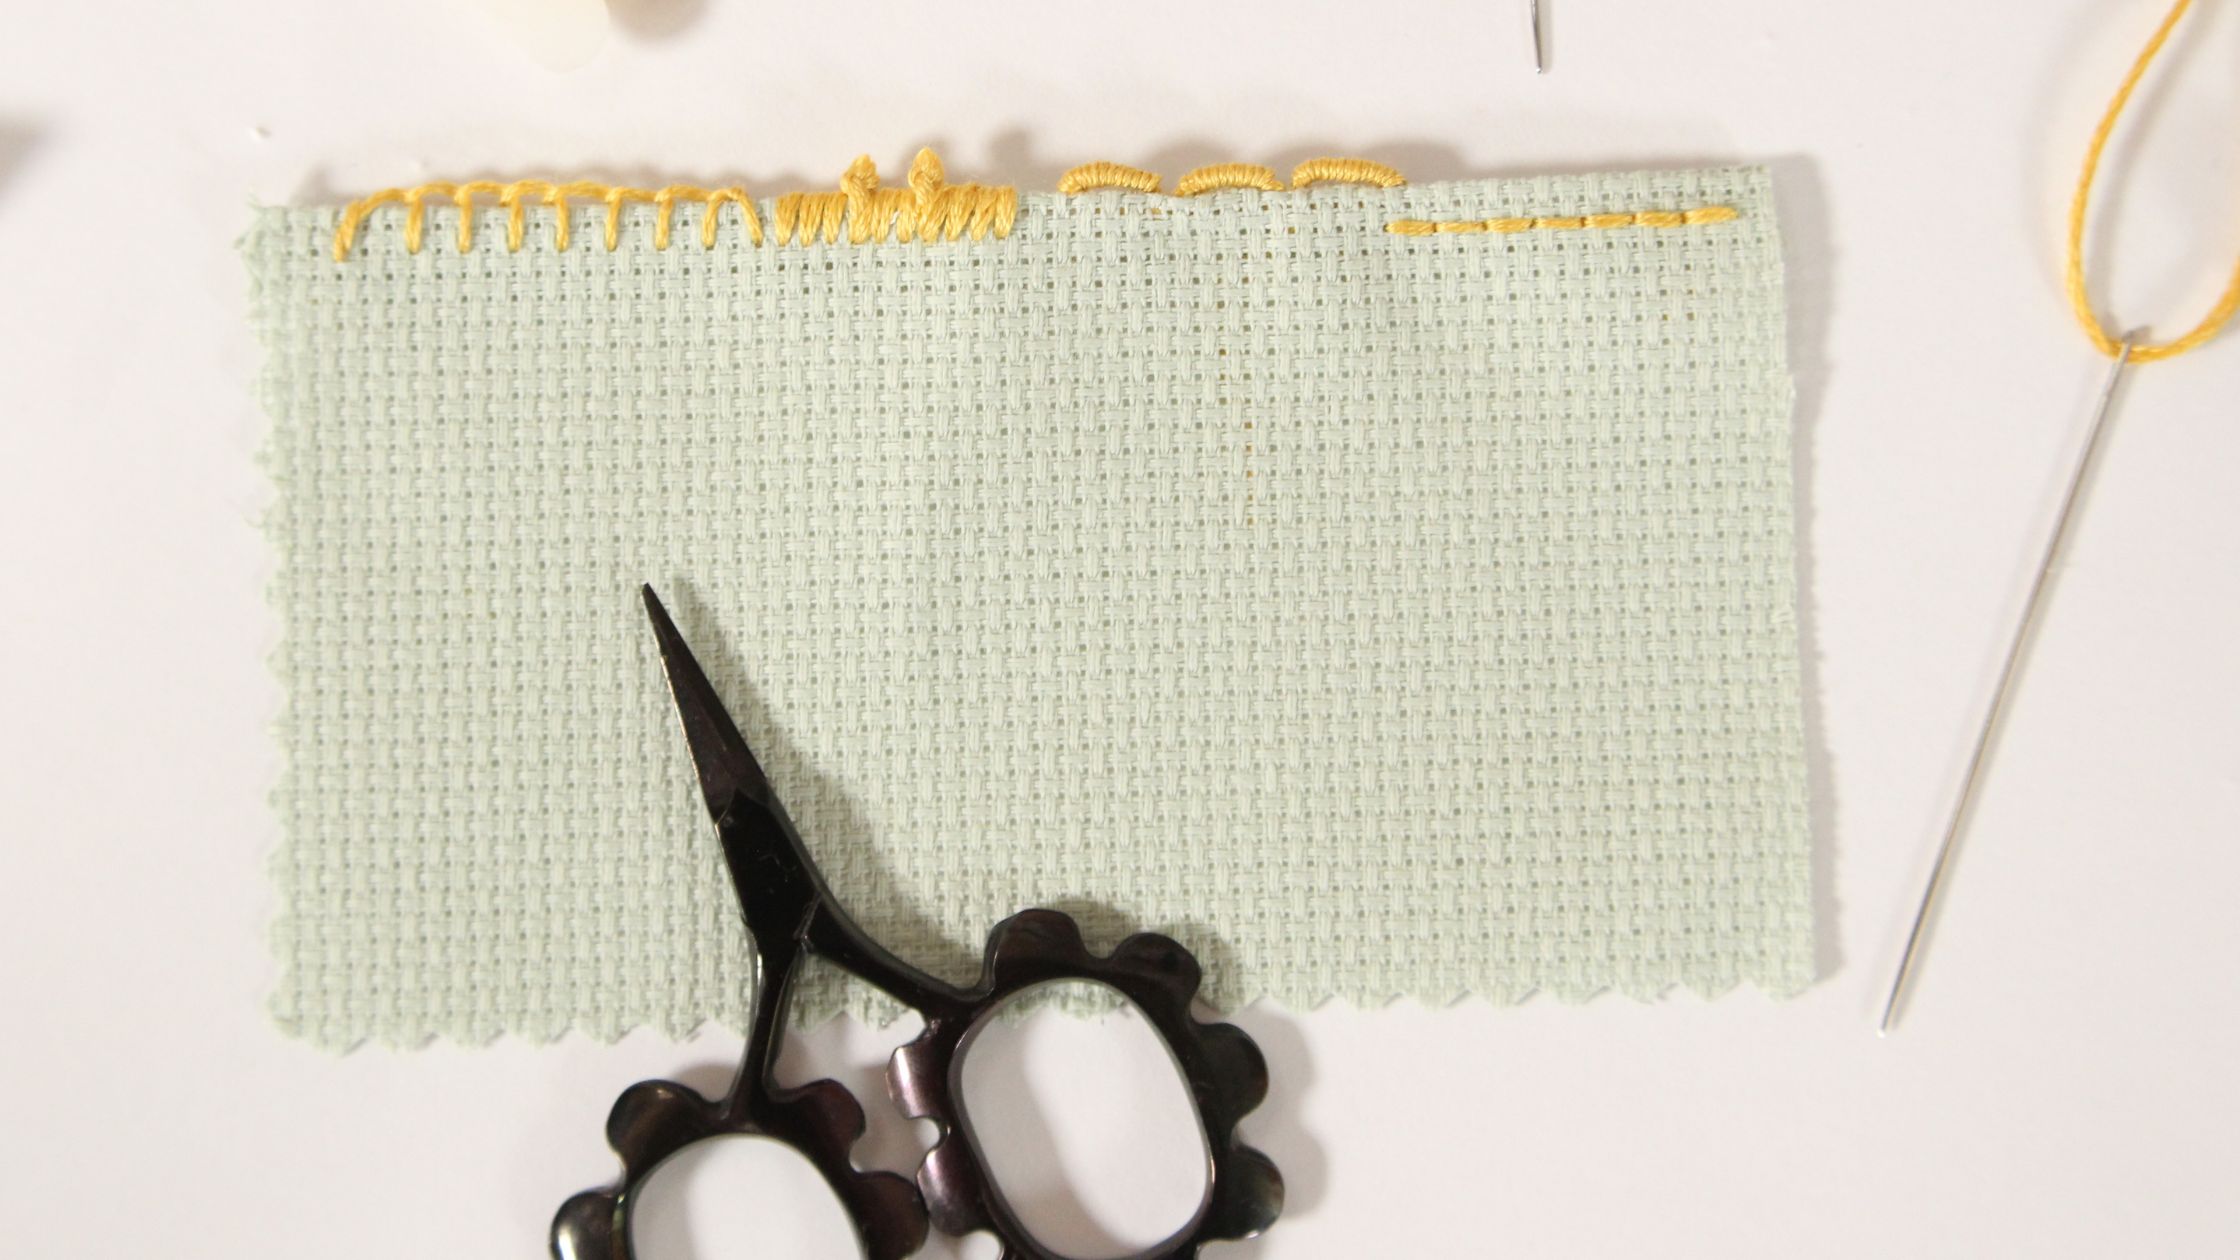
Make a Loop Start
Starting with a loop start will minimize the thread tails along the back. It’s a much cleaner way to start a stitch and saves a little bit of time!
Make a Pin Stitch
Another great technique for starting threads is a cross stitch pin stitch. This stitch is virtually invisible once you cover up the area, and it’s a great way to anchor the thread when you get started.
Don’t Skip Around
Skipping around a pattern will make the back and front of your work messy, and the tension of your stitches may not be consistent.
It’s good practice to stick with one area, and work outward from there.
If you’re working with a specific color, and some of the stitches you need to make aren’t directly adjacent to or within a few stitches (about 2-4 stitches away), I find it easiest to end the thread and start with a new one. This will prevent the thread from being carried too far across the back, which can cause tangles and visible threads through the fabric.
Park The Threads
Say you’re not entirely done with a piece of thread and need to leave it be for a while so you can work in another area. Instead of securing and cutting the thread, which would be a waste, you can pull the color to the front of the fabric where you plan to make your next stitch. This will keep the tail of the thread out of the way, preventing any tangles until you’re ready to stitch with it again.
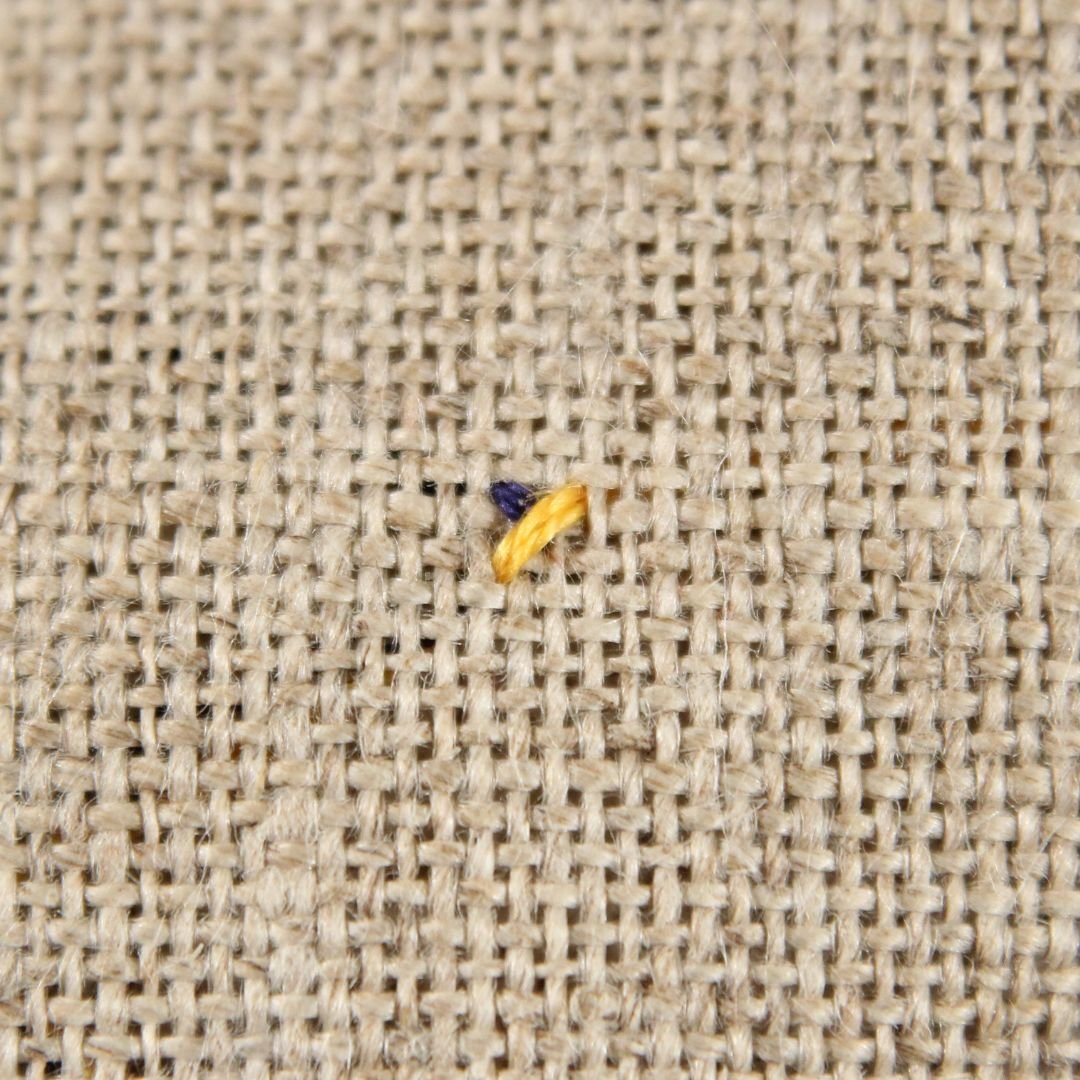
Avoid Knots
I avoid making knots on the back of my work.
They cause a few different problems:
- Stitches may get pulled too tight.
- They can come undone.
- They may leave bulk on the back of the fabric, which can cause problems, especially if you decide to frame your work.
- They can get in the way while you stitch, causing knots and tangles.
To end a piece of thread, tuck the tail underneath several stitches.
Trim Those Tails!
When you end a piece of thread, trim the tail as close and short as possible. Otherwise, the tail along the back will inevitably get pulled to the front of your work as you stitch, which can be annoying to fix.
I hope that you find these tips useful. While it’s fun to try your hardest and strive for high-quality work, all that truly matters is that you’re having fun and enjoying the process. Try a few of these suggestions, but remember not to be too hard on yourself!
You May Also Find These Tutorials Helpful
- Tips for working large cross stitch projects
- Cross stitch gridding tutorial – prevent yourself from getting lost in a pattern