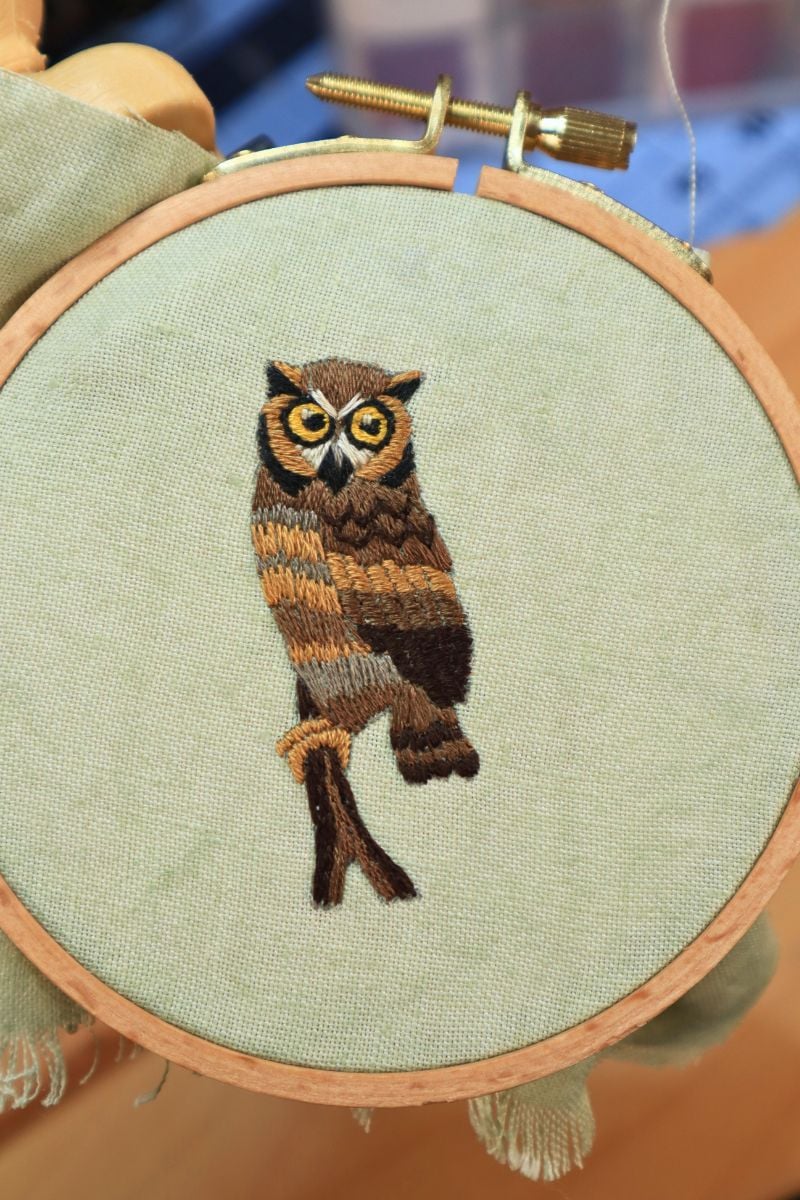
Simple Owl Embroidery Tutorial With Free Pattern
I’m not sure if it’s all the Twin Peaks I’ve been watching or the hooting of the owls outside at night, but I got this idea in my mind of a simple great horned owl embroidery, so I decided what better time than now to stitch one.
If you’d like to follow along, I’ll walk you through each step in this tutorial. There’s also a free, traceable design and a list of the DMC color codes I used. This embroidery is fun and takes an hour or two. It uses a few basic stitches, so don’t feel intimidated if you’re new. Okay, let’s get started!
Disclaimer: This post contains affiliate links, which means I may earn a small commission if you choose to purchase an item.
Supply List
- Traceable owl design – download here
- 4-inch embroidery hoop – Etsy
- Cotton or linen fabric
- Embroidery needle – Colonial Needle
- DMC stranded embroidery floss
- 310
- 169
- 613
- 645
- 3031
- 3371
- 3820
- Scissors
- Fabric marker or pen to transfer – I used a Frixion pen
Owl Embroidery Tutorial
Getting Started
Place the fabric in the hoop and use your preferred transfer method to trace the design onto it.
This project uses two strands of floss throughout.
Stitches Used
If you’re unfamiliar with any of the stitches used, check out these tutorials:
Stitching the Owl’s Face
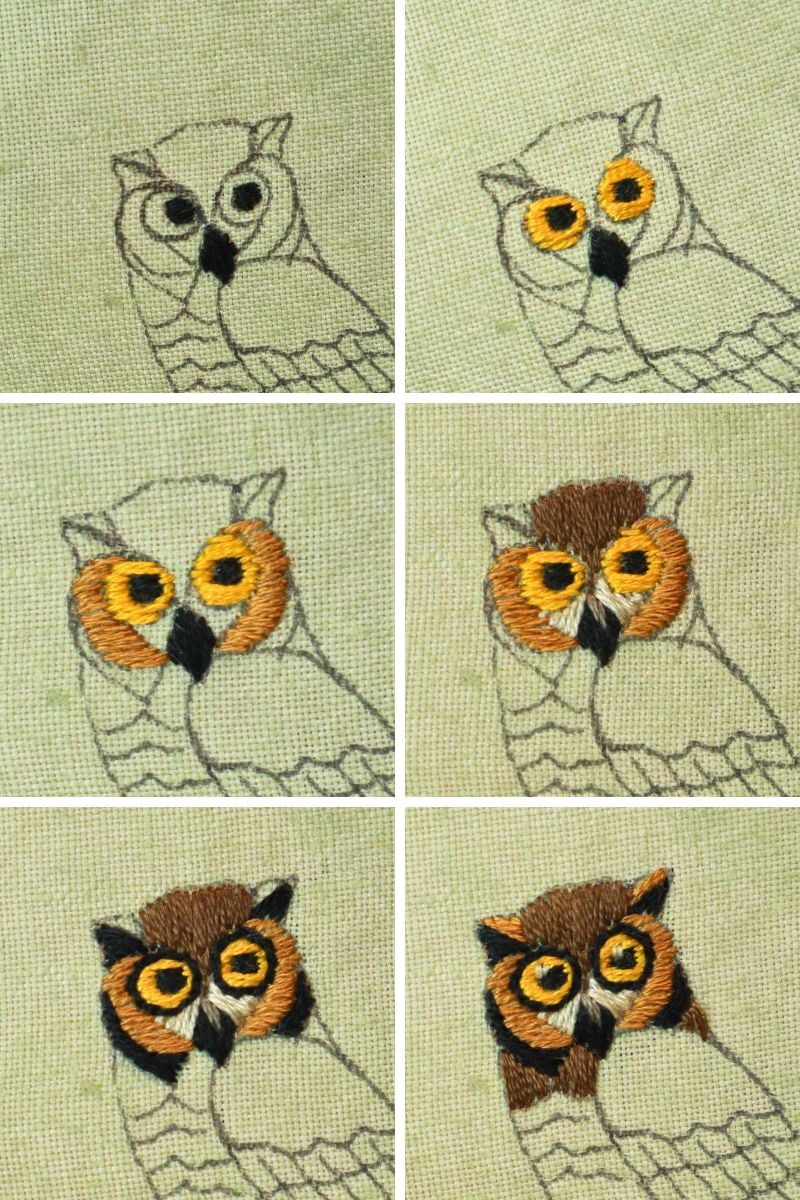
- Using black floss, fill in the pupils with horizontal satin stitches. Then fill in the beak with vertical satin stitches.
- Fill in the remaining areas of the eyes with horizontal satin stitches in golden yellow, ending the stitches neatly beside the black stitches.
- Fill in the sides of the face with horizontal light brown satin stitches.
- Fill in the forehead with vertical long and short stitches using medium brown.
- Fill in the bottom half of the horned feathers and the sides of the head with diagonal satin stitches using black floss. Then, split stitch around each eye.
- Fill in the base of the neck with vertical satin stitches using medium brown floss.
Stitching the Wing and Body

- Fill in the top of the wing with vertical long and short stitches using medium brown. End these stitches neatly along the edge of the beak and face, as well as along the bottom scalloped edge.
- Fill in the small feathers of the wing with horizontal satin stitches. Start with light brown, then use medium brown in the middle row, and finally dark brown in the bottom row of feathers.
- Make two rows of fly stitches on top of the stitches in the upper wing. Stagger the second row of fly stitches so that the stitch starts in the center of the stitch above, so that it looks like small, scalloped feathers.
- Fill in the breast and body with vertical long and short stitches, using a mixture of light brown, medium brown, and grey floss.
Stitching the Tail, Feet, and Branch
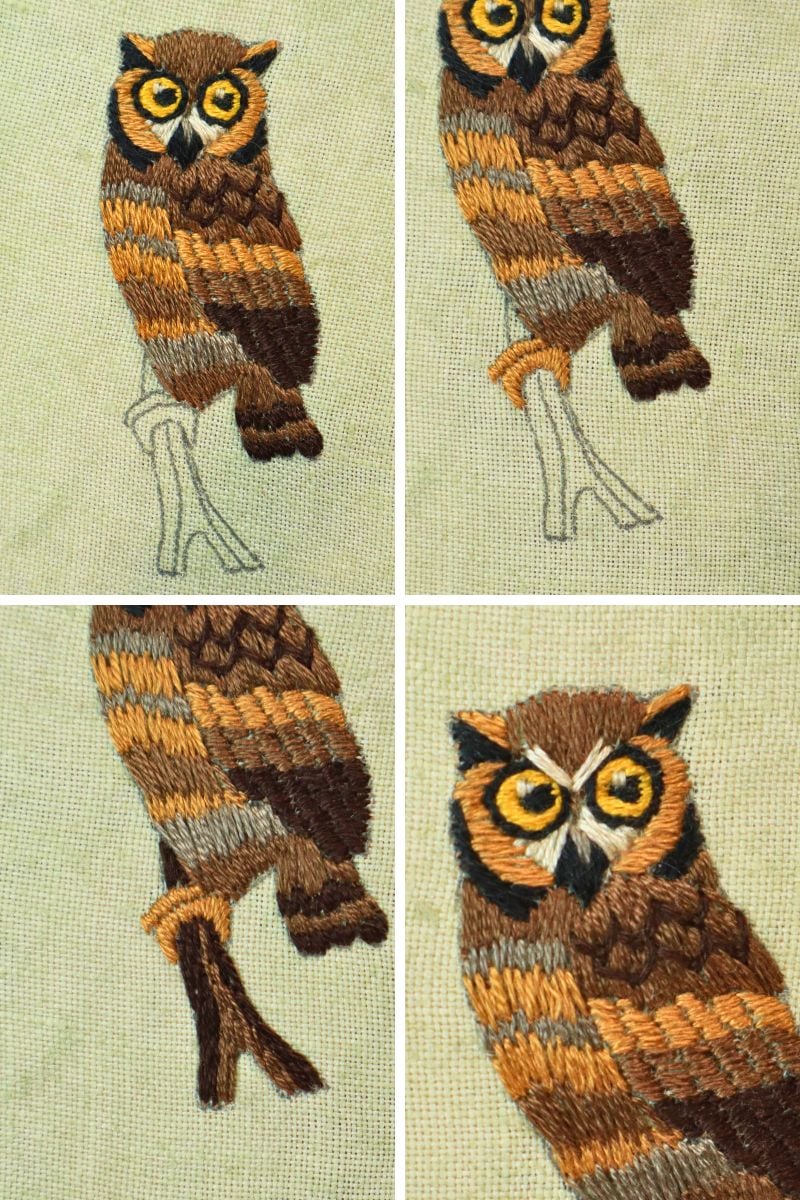
- Fill in the tail with vertical satin stitches using dark brown and medium brown.
- Fill in the feet with satin stitches using light brown.
- For the branch, use medium brown in the center and dark brown along the sides. Fill in with long and short stitches.
- To complete the embroidery, add a few stitches that meet in a “V” shape above the owl’s eyes to give it that characteristic expression that great horned owls have!
This little owl would look adorable on the collar of a shirt or simply included in a project you’re already working on. Happy stitching, and remember: the owls are not what they seem!
Video

More Owl Embroidery Designs
Check out some of my patterns with more realistic owl renderings, or if you’re looking for even more kinds of bird designs, I think you’ll love this cardinal embroidery tutorial and a roundup of a bunch of different bird embroidery patterns.
-

Reading Owl Embroidery Thread Painting Pattern
$10.00 -
Barn Owl Embroidery Pattern
Original price was: $10.00.$9.00Current price is: $9.00.


