Hand Embroidery Monogram Tutorial – Personalize Your Linens!
Nothing feels classier than having personalized linens. If you’re looking to learn how to embroider a monogram by hand, this tutorial will show you an easy way to make a decorative letter that has a smooth, slightly raised finish.
I’ve done another tutorial on creative ways to fill in block lettering, but I think classic, cursive monograms look best outlined or filled in with a padded satin stitch.
This tutorial is an easy one to follow along with, but if you want an even quicker and simpler approach, check out this post to find a few stitches that work great for outlining and this post all about embroidering simple letters.

Disclaimer: This post contains affiliate links, which means I may earn a small commission if you choose to purchase an item.
Hand Embroidery Monogram Tutorial
Supplies Needed
- embroidery hoop
- embroidery needles
- embroidery floss in your choice of color – DMC is my favorite
- scissors
- fabric marker or pen – I like Leonis markers for this
- A design to transfer onto the fabric – I used a letter from this book, but this post has even more free monogram designs
Keep reading for a step by step tutorial, or hop to the video tutorial.
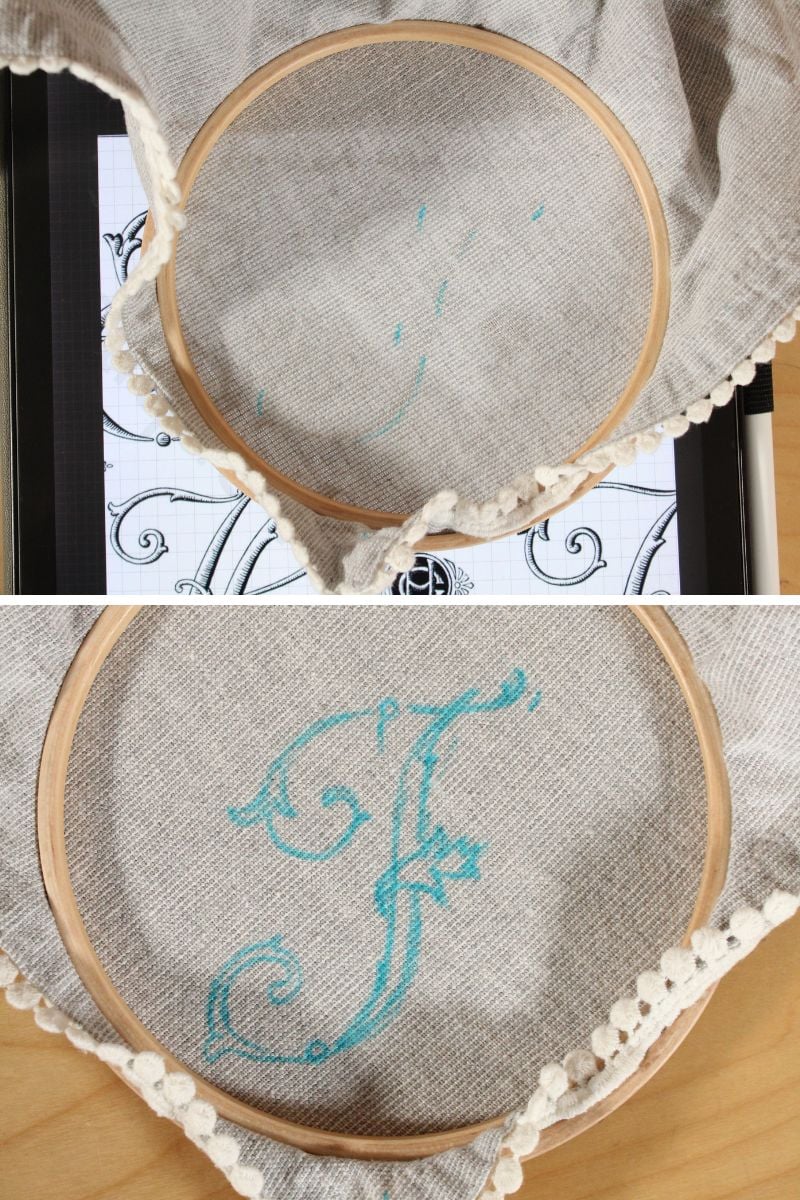
Placing and Transferring the Design
Before you place the fabric in the hoop, mark out some guidelines to keep the letters straight. Mark the center of the area and any other small marks to help you orient your design. If you hoop the fabric beforehand, you may end up misaligning the monogram.
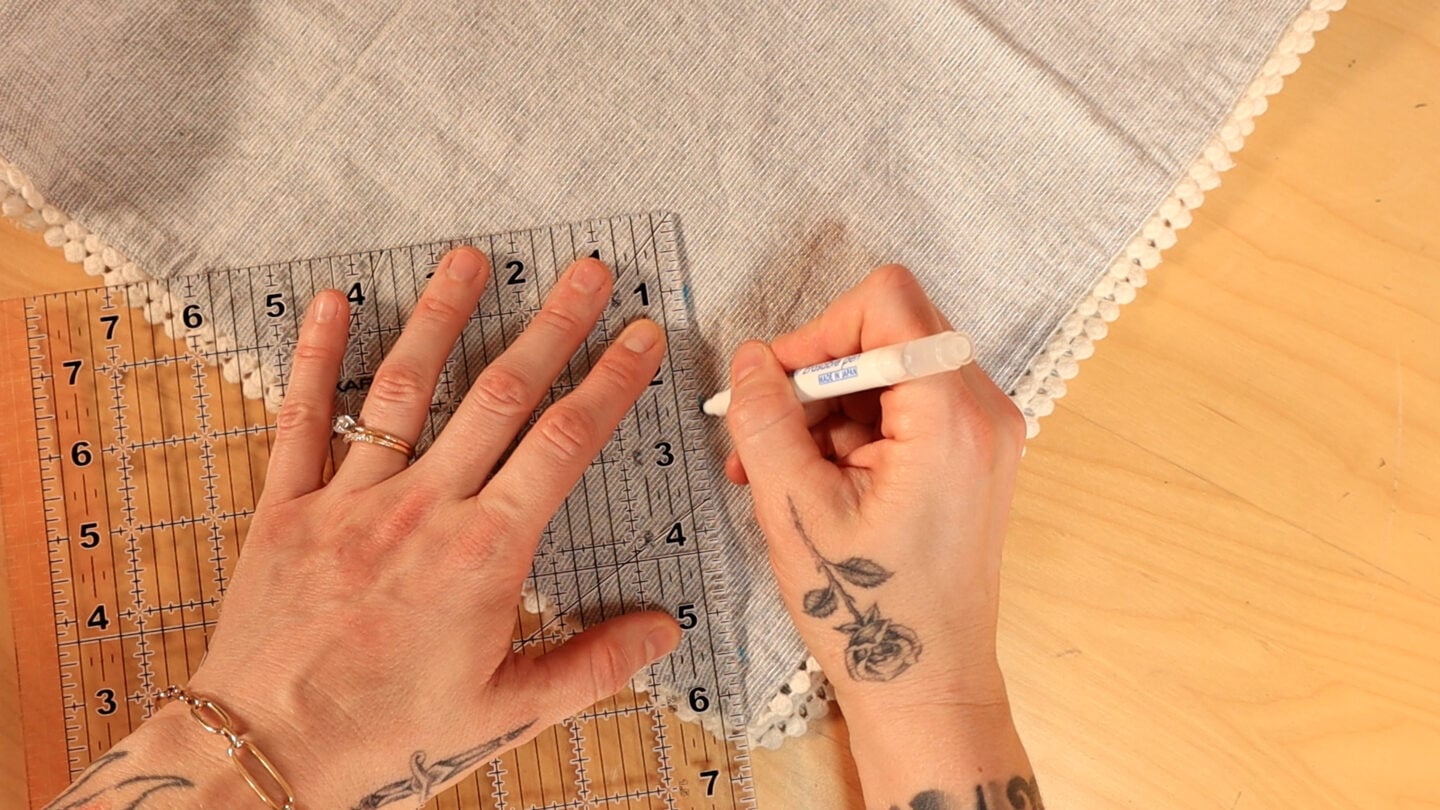
Once you’re happy with placement, you can place the fabric in the hoop and trace the design.
I placed the fabric in the hoop with the outer ring behind the fabric. I have found that hooping the fabric backwards and stitching with it this way helps to keep the excess fabric out of the way.
Embroidering The Monogram
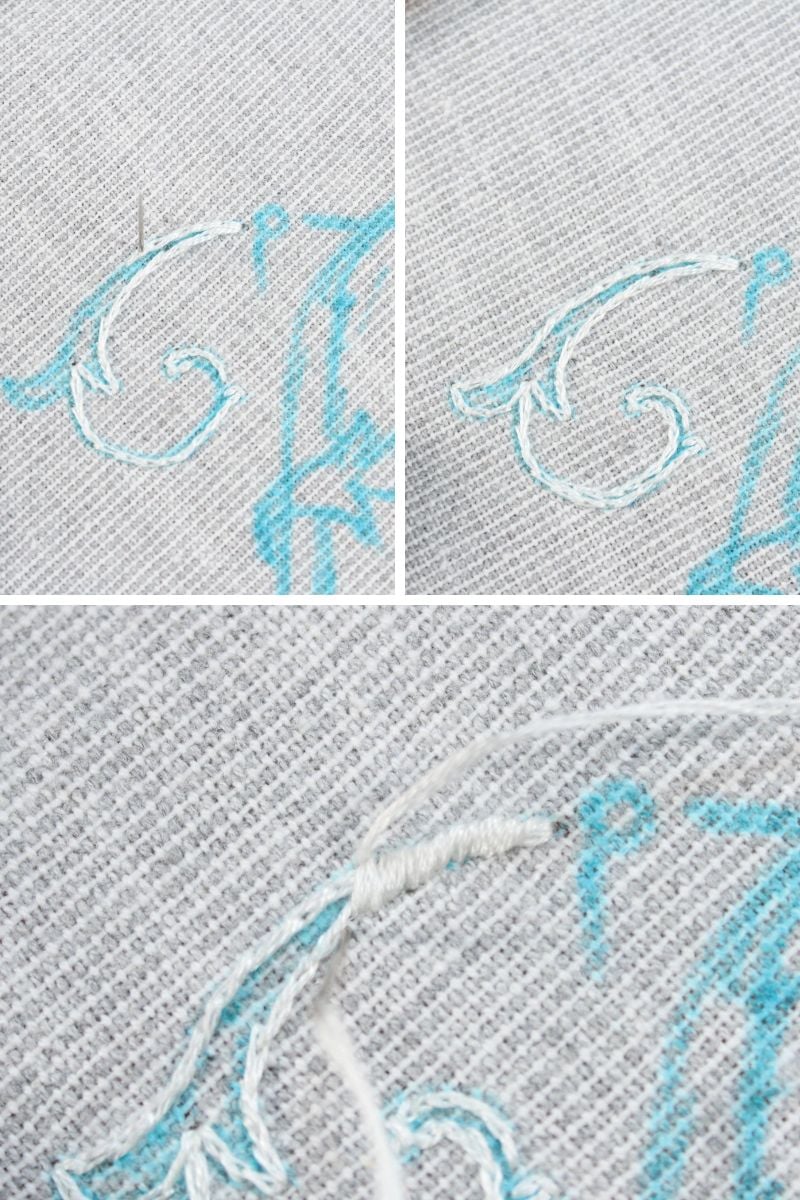
Since this napkin will be frequently washed, I want the stitches to be nice and secure. I prefer to start threads with quilters knots.
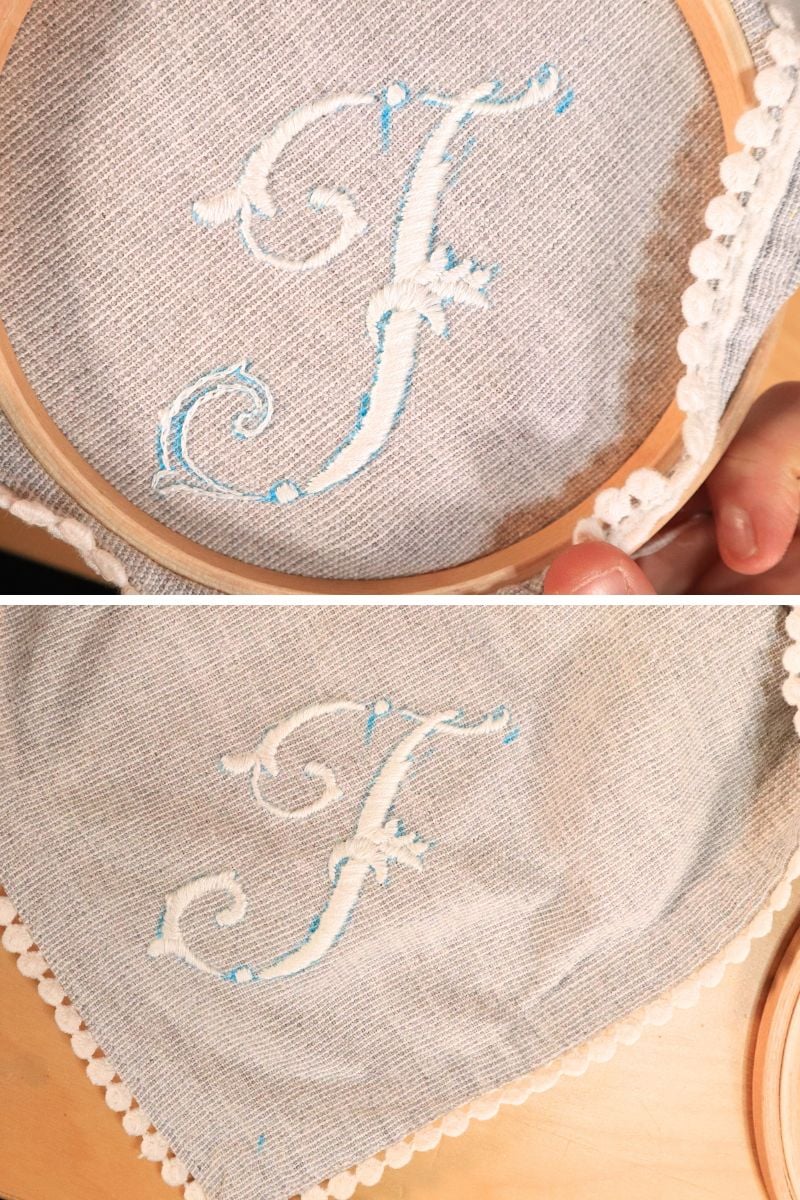
The padded satin stitch involves two steps. First, outline and/or fill the letter with a stitch such as the split stitch or the chain stitch. Then work the satin stitch over top of these stitches.
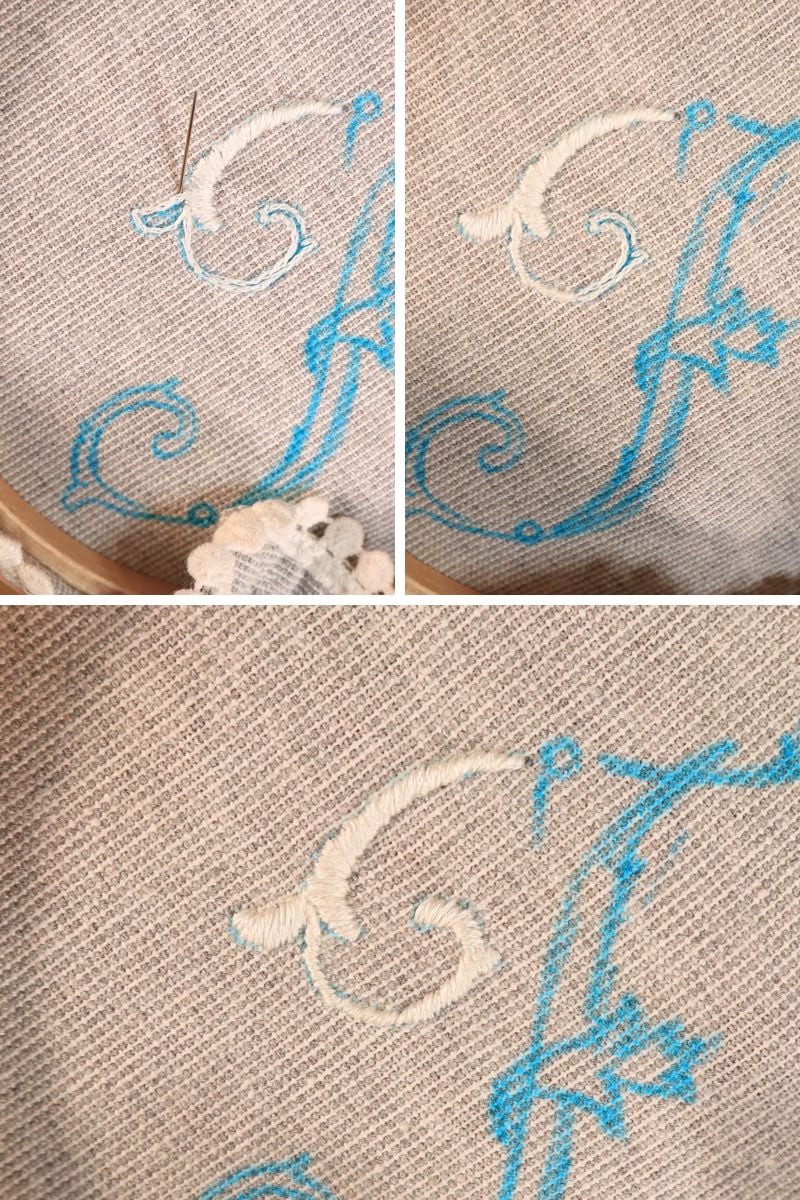
Step 1: Outlining And Filling With The Split Stitch
For the first step, use an outline stitch along the edges of the letter. I will be using 3 strands of floss and making a split stitch to fill in my letter.
For smaller areas, outlining the shape will be enough. For thicker parts, adding a few rows of outline stitches along the inside edge will add padding, making the satin stitches stand out more.
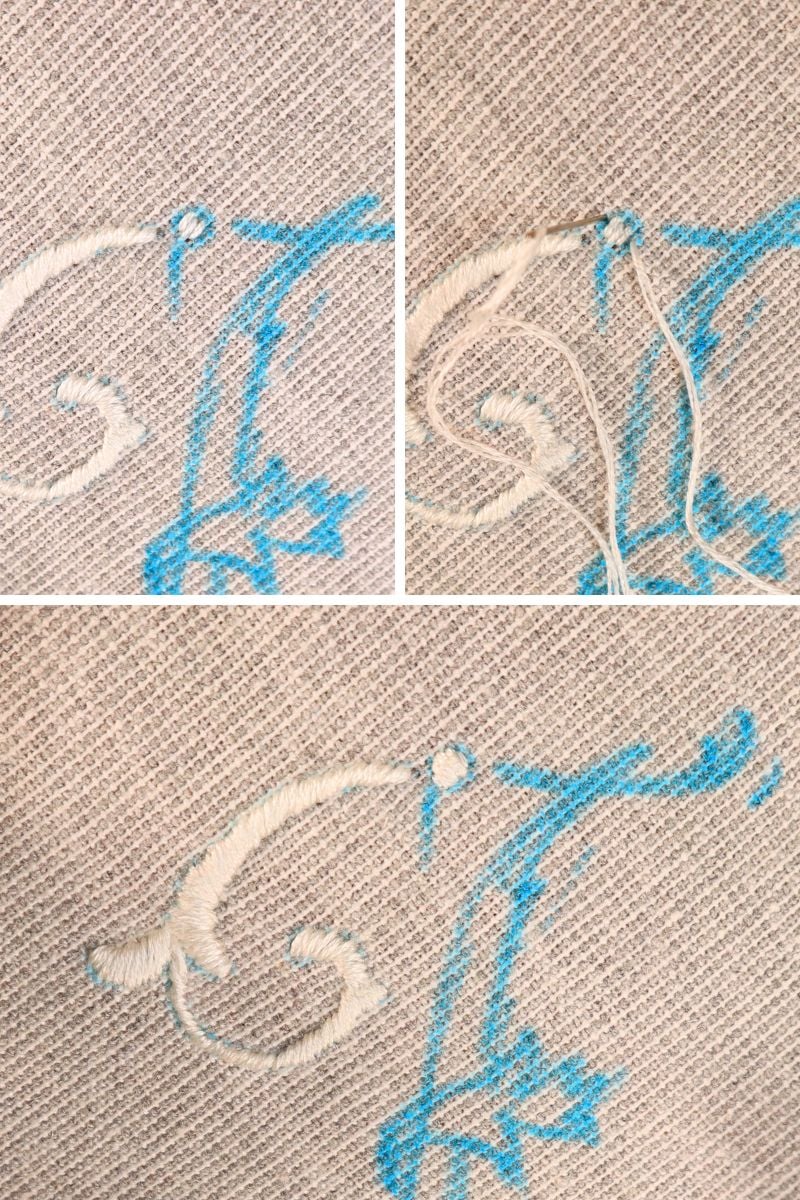
Step 2: The Padded Satin Stitch
When you fill in the letters, it’s best to fill in them in a way that allows you to make the stitches across the shortest distance. Also, stitching at a slight diagonal will help you achieve a neater edge.
If you need to, start along the center of a line to make it easier to orient the stitches. Otherwise, you can start at the very tip of the letter. Each stitch should start and end along the edge of the shape, completely covering the outline stitches. The embroidery I’m making is relatively small, so I used 3 strands of floss for this part.
This part takes awhile, but try not to rush it. Slowing down will help you achieve neater stitches. It’s well worth the extra time!
If you notice some gaps between the stitches, it’s totally fine to go back through and fill the area in more densely with stitches.
Filling In Small Circles
Small circles can be filled in with another variation of the padded satin stitch. Make a few satin stitches inside the shape, then layer more satin stitches on top, going in a perpendicular direction to fill in the rest of the shape.
Outline and fill in the letter’s thicker areas with an outline stitch to add more padding before adding satin stitches on top.
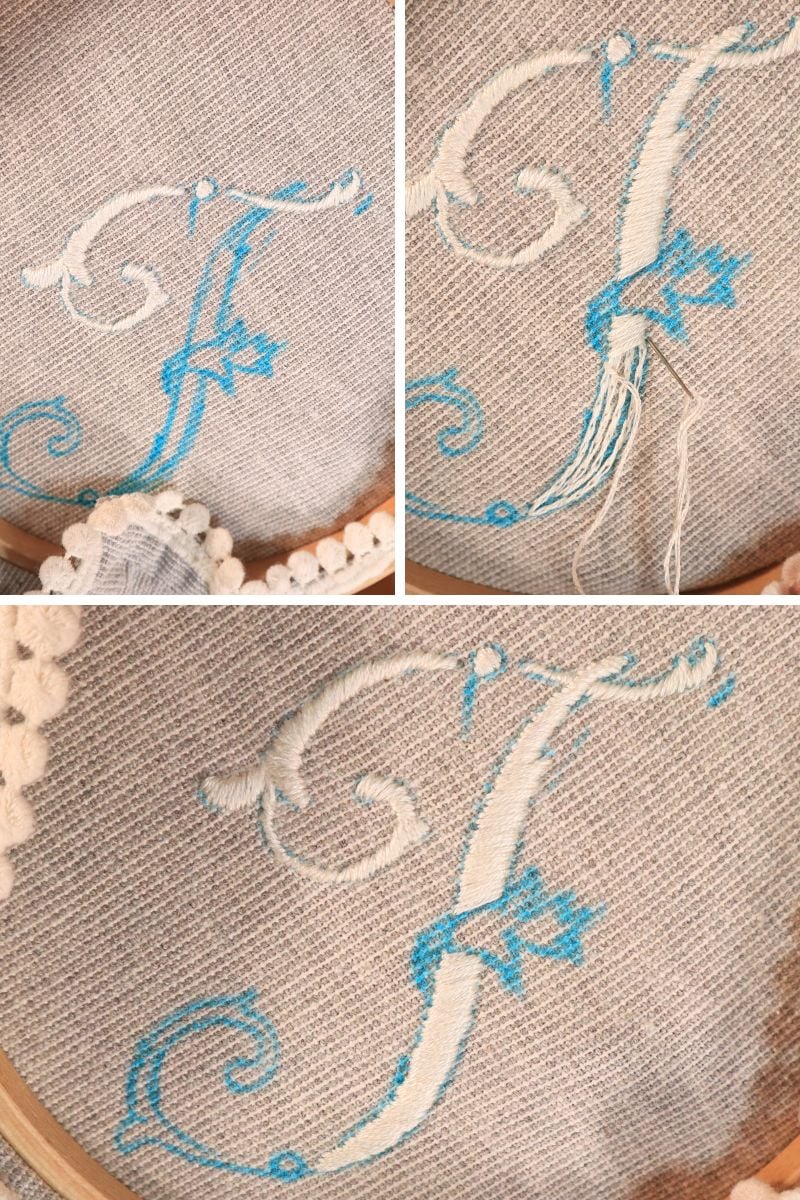
Tips for Working Along Curves
It’s best to gradually fan the stitches out along curves. To do this, place a few stitches spaced out along the shape to mark the direction you want them to go. Then fill in the remaining area.
The stitches can change direction along decorative filigrees or areas that branch out. Just make sure you neatly end the stitches near one another so no fabric shows through.
Ending Stitches
If you’re embroidering on something that may show the back of the embroidery, such as a towel or napkin, try not to carry the stitches along the back. If you need to move to a different area of the fabric, end the current thread and begin a new one.
You can use a sewing knot to end a piece of thread or weave it in and out of the stitches a few times to secure it well.
Filling In Decorative Accents
Lots of monograms have dainty flowers and filigrees in them. If the design you’re using has some of these, take a look at these posts that will show you how to embroider flowers and leaves for some ideas of additional stitches you can use.
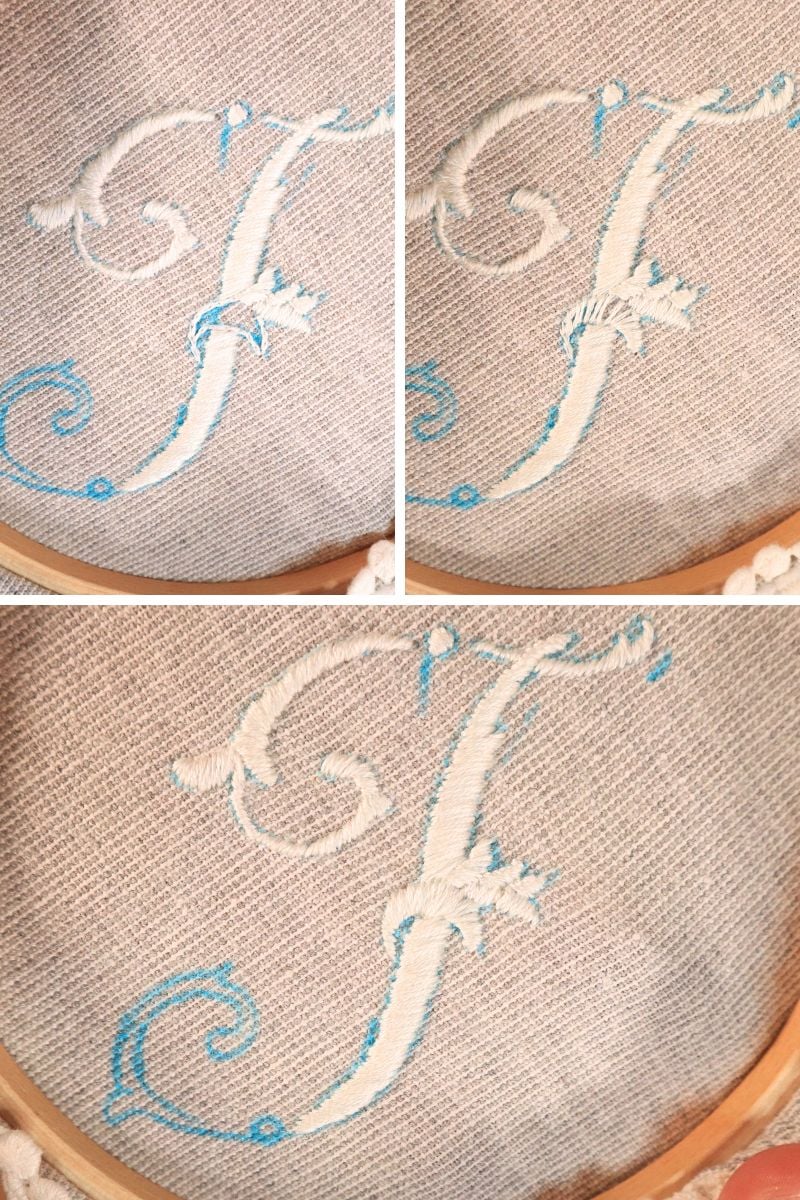
Finishing Up
When you’re done stitching, remove any marks along the fabric. Double check that all of your threads are trimmed and secured. Wash and press the embroidery, and then you’re ready to enjoy your creation!
Embroidery Care
I recommend washing embroidered linens and clothing by hand or on a delicate setting on your washing machine, then air drying.
Hand Embroidered Monogram Video Tutorial