Essential Thread Painting Techniques – Roadmap From Beginner To Pro
If you’re just beginning your thread painting embroidery journey or you’re ready to take the next step and start creating and customizing your own designs, you’ve landed in a great place!
This article is a “roadmap” to help you become proficient in the art of thread painting (aka needle painting). I’ll walk you through what to do to learn the basics, and then show you how to build upon the essential techniques to go from proficient to pro.
Thread painting is my preferred style of embroidery. I’ve been doing it for over ten years, and there has been a lot of trial and error involved. I’m entirely self-taught and don’t come from a traditional art background, so I know how challenging that can be to navigate. But in the age of the internet and all of the available resources, there is no better time than now to learn.
This article provides an overview of the learning process that includes actionable steps to take along the way.
P.S. If you’d rather listen, jump to the video. And if you’re looking for a step-by-step tutorial, I have another article that goes over the basics of thread painting.
Thread Painting Technique Roadmap

Step 1: Learn the long and short stitch
While you can utilize other stitches within thread paintings, the long and short stitch is the primary stitch to learn.
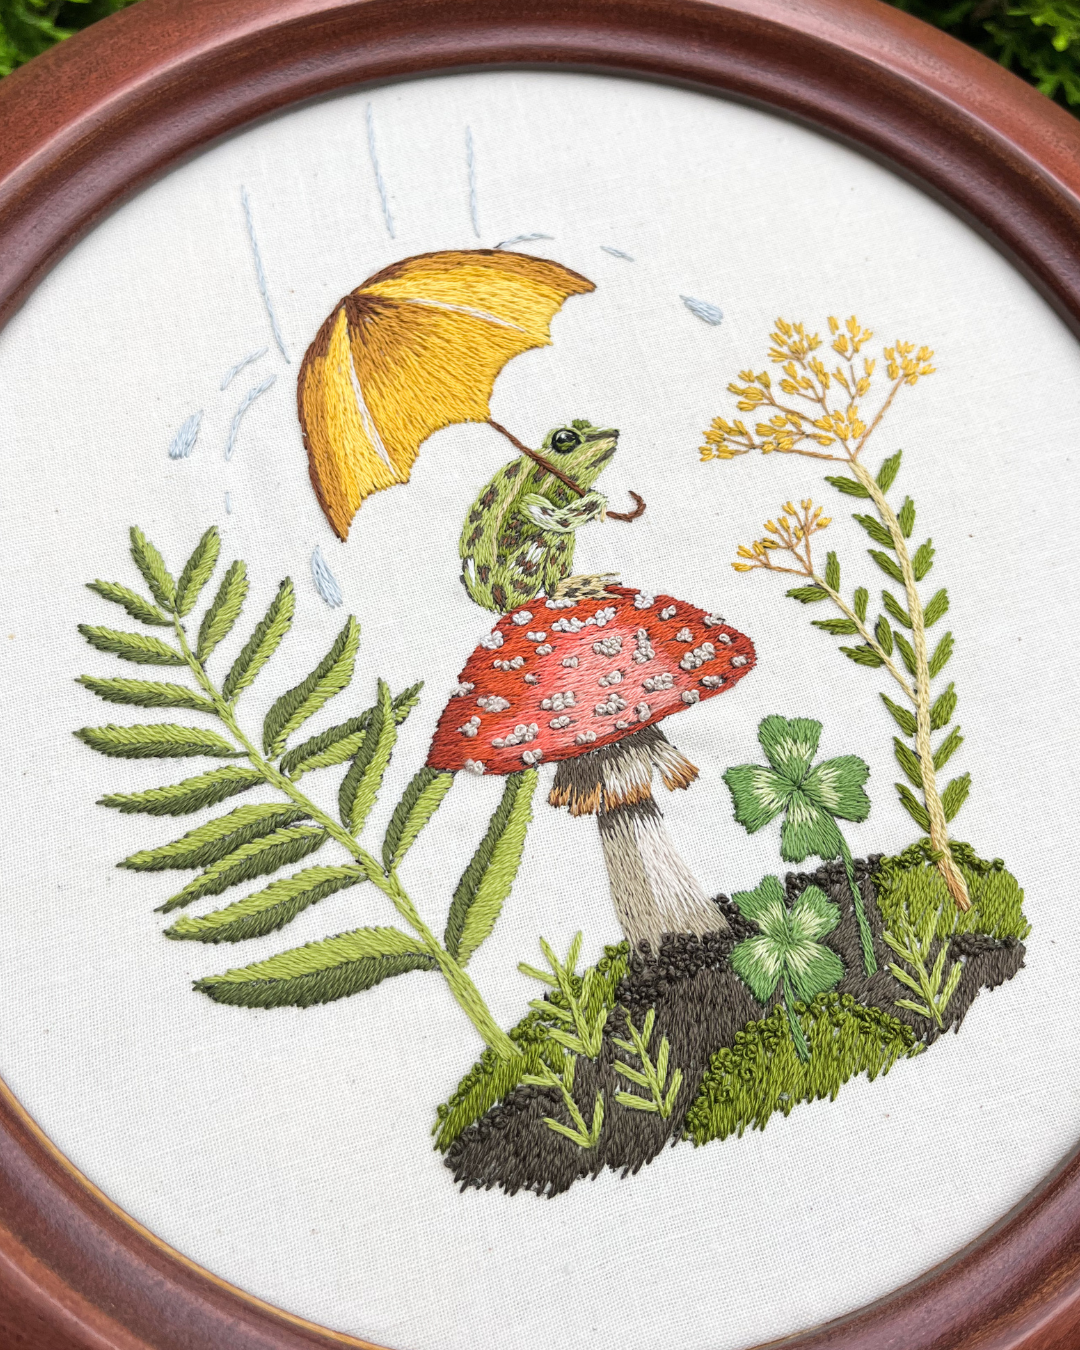
This stitch seems very simple in theory (laying stitches across an area in varying long and short lengths), but it is notoriously challenging for people to learn. Don’t be frustrated if you’ve tried it before and felt like it was tricky. Practice it for a bit, and you’ll start to get the hang of it!
Let’s start with this tutorial that will teach you the fundamentals of the long and short stitch.

Step 2: Practice filling in irregular shapes
Once you’re comfortable with the basic long and short stitch technique, you’ll want to practice filling in more irregular shapes. This involves figuring out how to gradually change the direction of your stitches, as well as getting a feel for how long you should be making the stitches.
You must become comfortable with this because it will come in handy once you start stitching specific subject matter.
Check out this tutorial for filling in flower petals with the long and short stitch to get started.

Step 3: Complete Your First Project
Next, you’ll want to start working on some sort of project. It feels less daunting to start working on a pattern that someone else has already planned out, stitched, and tested. That way, you can just focus on learning. You’ll have a defined goal, and you’ll feel more supported and encouraged throughout the process.
Working through a pattern is also beneficial because it will allow you to see how to execute a particular design. You’ll get a feel for how to use the stitches, and it will give you a better understanding of how different colors are used and blended together.
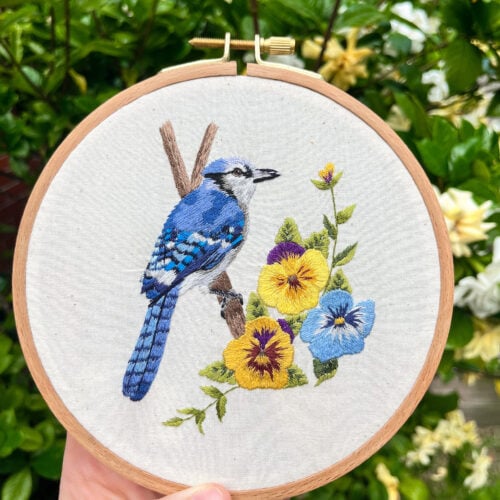
What To Look For In A Beginner Pattern
Thread painting patterns usually come with a traceable design, color suggestions, and basic technique instructions. Stitch diagrams are helpful, and step-by-step photos for completing the design are a must.
Be careful when you’re shopping around: AI-generated embroidery has flooded online marketplaces lately, and it can be hard to spot. These patterns are often of poor quality, they aren’t tested by humans, and they don’t usually contain instructions. Take a look at this article for tips on identifying AI embroidery designs.
If you’re unsure of where to look for high-quality patterns, there are plenty of patterns here in the shop. Or you can take a look at some of these embroidery artist recommendations.
Recommended products
-
Embroidered Leaves – Beginner Thread Painting Pattern
Original price was: $10.00.$9.00Current price is: $9.00. -
Butterfly Embroidery Pattern
Original price was: $10.00.$9.00Current price is: $9.00. -
Pansy Thread Painting Embroidery Pattern
Original price was: $10.00.$9.00Current price is: $9.00. -
Blue Jay Thread Painting Embroidery Pattern
Original price was: $10.00.$9.00Current price is: $9.00. -

Reading Owl Embroidery Thread Painting Pattern
$10.00 -
Flower Stand Mouse Embroidery Pattern
Original price was: $10.00.$9.00Current price is: $9.00.


Step 4: Learn How To Reference Photos
Working off of reference photos is the first step in the right direction if you’re interested in creating your own thread painting designs. Using reference photos can help you learn how to draw, and it will also sharpen your observation skills.
It’s easy to trace or copy an image, but it’s better to be more intentional when you’re using one. Study the color changes, the shadows, and the highlights while you’re referencing it. Think about how you can plan out the stitch direction to follow the contour of the object or add specific details.
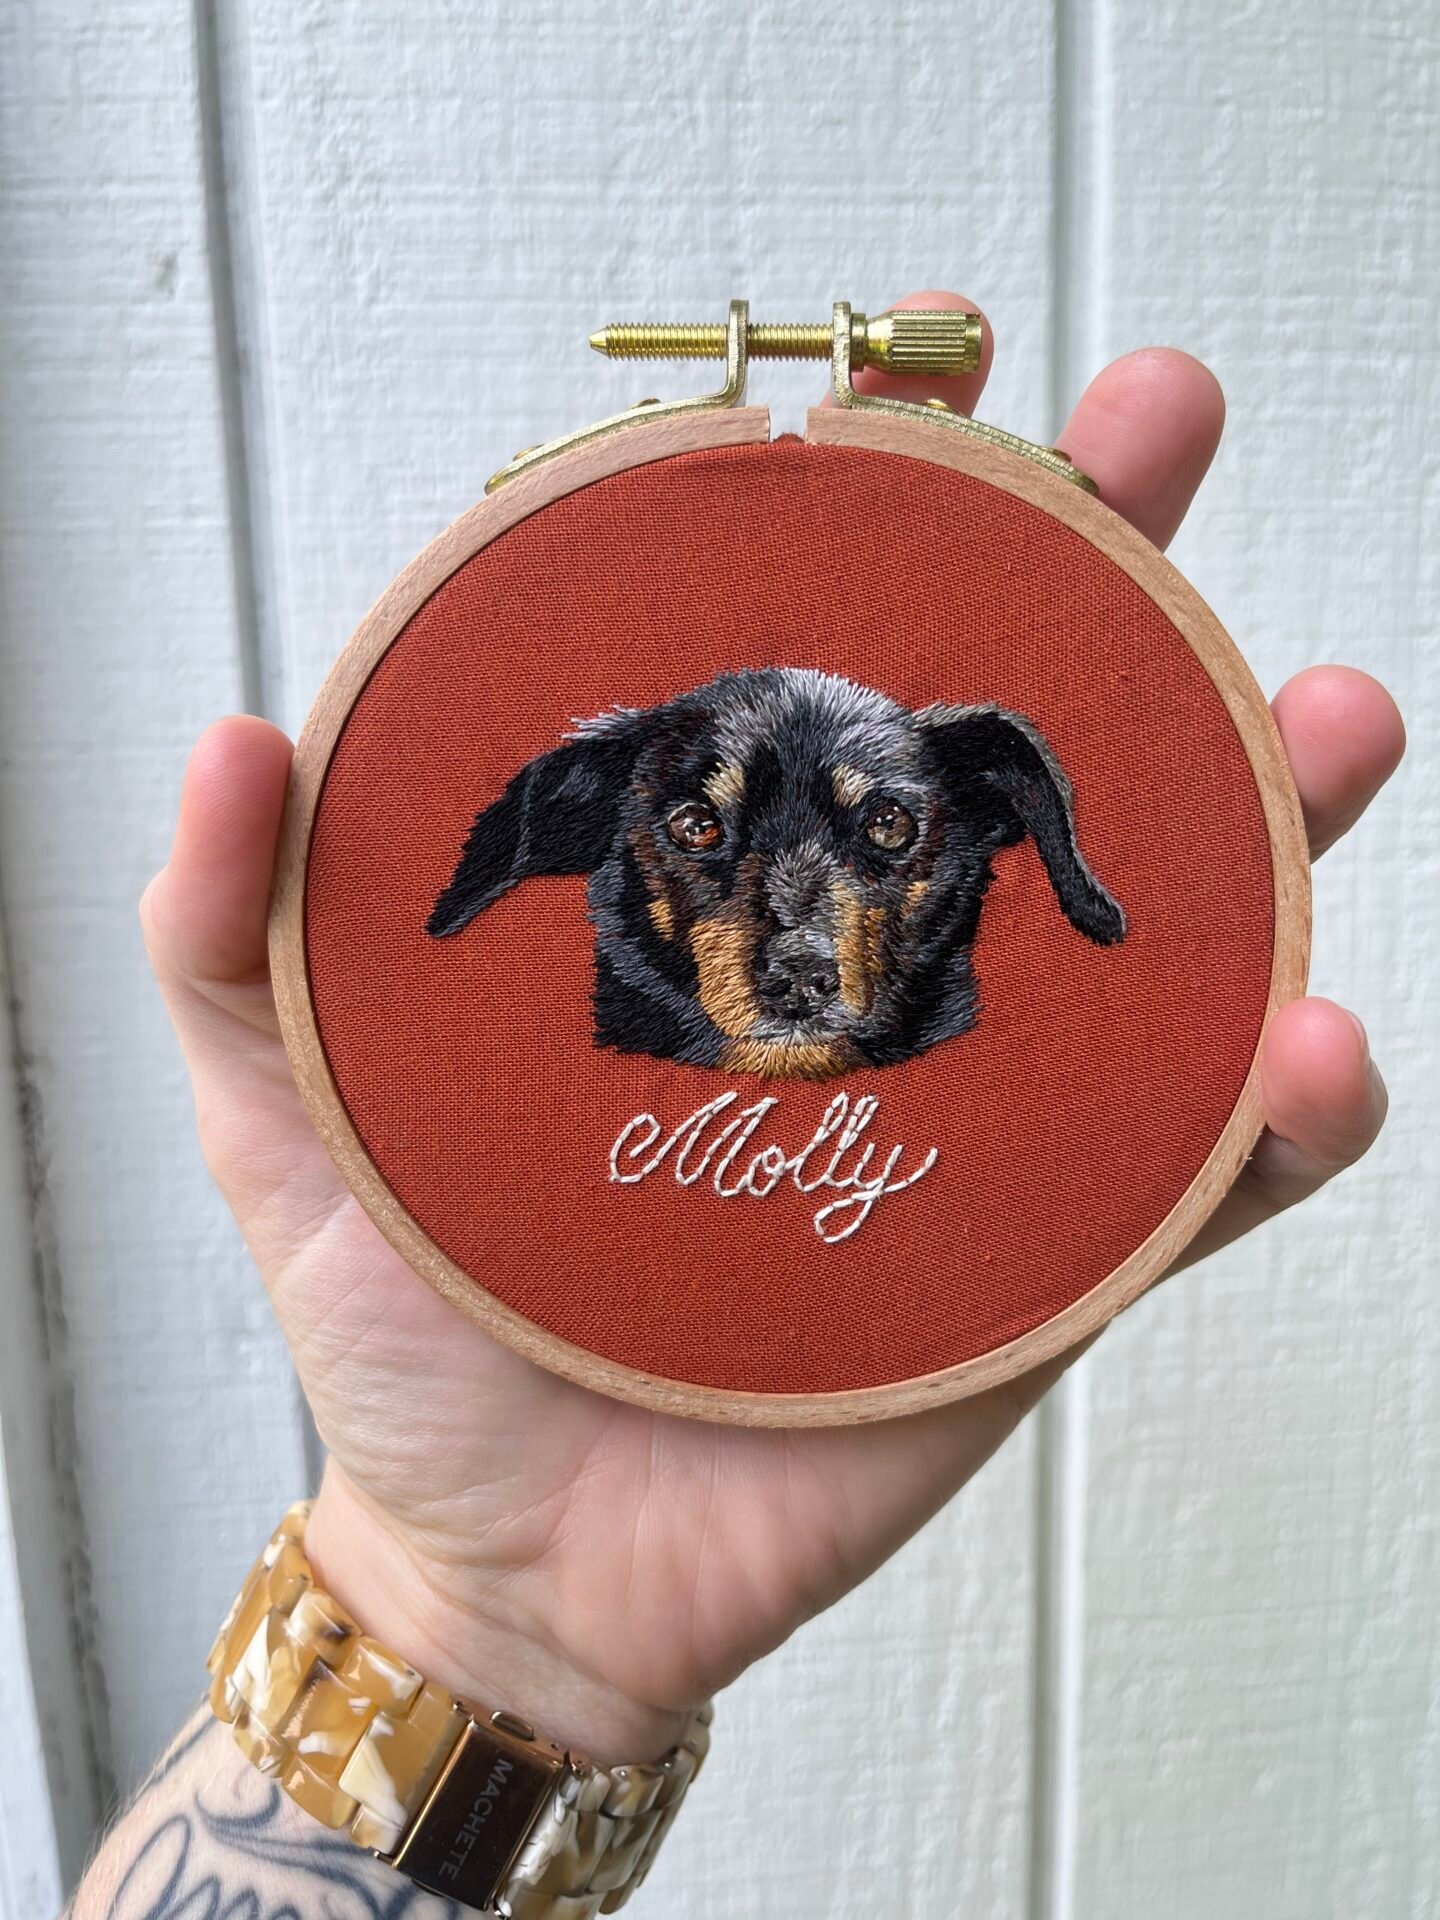
I still reference photos, especially if I’m wanting to make something look super realistic (like pet portraits). I take reference photos on my phone, and I also utilize stock image sites like Unsplash and Pixabay.
It’s essential to select photos that are high quality and are an accurate depiction of the subject matter. You can only stitch what you see!
Take a look at these tips for taking your own reference photos and this tutorial for creating embroidery designs using a photo.

Step 5: Learn color theory
As a self-taught artist, I initially avoided learning art fundamentals for a long time. I felt like these topics were for “real artists” and maybe too complicated for me to understand.
I’m here to tell you that you don’t need to know EVERYTHING about color. You just need to start developing an eye for it.
Start by learning about some of the most common color schemes and understanding how and why specific colors look good together.
Pallette Scout is a card deck that allows you to easily develop color palettes and learn about color theory. I use it all the time, and it’s something I recommend to anyone wanting to learn more about color. Here is my referrel link if you want to learn more about it.
You can learn many basics online, and I have a few articles about choosing color for embroidery, color matching, and blending colors. For even more in-depth tutorials and activities, check out my Patreon.

Step 6: Learn how to draw
This step is one that you can do while you’re learning about color theory, but it’s totally fine to work on these skills separately, too.
Drawing can feel intimidating for people, and I was no exception! I never felt naturally good at traditional art mediums when I was younger, so I avoided learning to draw for a long time.
That was a massive mistake on my part, and it’s a trap I hope you don’t fall into! Drawing and art are skills that anyone can learn. You don’t have to be a naturally born artist to do so, and you shouldn’t be scared to try.
Today, I treat embroidery as just as much an art as it is a craft. Becoming proficient in traditional art-making skills will make you a much more well-rounded artist. It opens up a world of possibilities for your designs.
If you’re able to reference photos, have a decent understanding of color theory, and you’re able to utilize illustration techniques in your work, you can create highly customized designs.
Being able to draw will help you a lot, especially when you have a particular vision for a project, but you can’t find the perfect reference photo. If you know some of the fundamentals, you’ll have no problem figuring out how to bring your vision to life. You’ll be an embroidery unicorn!
Check out these tutorials on my Patreon: Illustration and Design Techniques and this Flower Illustration Tutorial

Step 7: Work on personal projects
If you’re ready to design your own patterns, working on your own personal projects is a must. You can only learn so much from tutorials until you’re going to have to put your skills to the test.
Pick a project that feels challenging, but small enough that it won’t be completely overwhelming to start. Try out some of the skills and techniques you’re learning in this project.
This is how you’re going to start synthesizing what you’re learning, and you’ll begin to develop your own methods and practices.
It’s common for people to get caught up in tutorials while they’re learning any skill. You may not feel like you’re ready, but I would like to give you a gentle push. Seriously, try making your own designs sooner rather than later. It never hurts to try. You’ve got this!
Mistakes are bound to happen, and that’s okay, too. It’s never a waste of time, especially if you found out that the particular approach didn’t work. You can still learn valuable lessons and start to pivot and try something different next time.
Mindset Is Everything
When it comes to learning a new skill, mindset is a massive part of how successful you will be. In the age of social media, it can be really easy to compare yourself to other people. Everyone does this, but it’s essential to take a step back and remind yourself that you should focus on your progress.
Even outside of comparison, it’s also common to be harsh and hypercritical of ourselves as artists. While being critical isn’t necessarily a bad thing, you should keep it at a healthy level. For example, it’s helpful to understand where your strengths and weaknesses lie. This will help you figure out what you should focus on, but you must set aside your “critical brain” while you’re making art and creating.
Try to reframe this time as play instead of immediately criticizing everything you’re doing. This will take the pressure off and allow you to think a little bit differently in the present. You’ll have amazing breakthroughs when you can let go of your ego and analytical side while you’re working!
If you’re having trouble with your mindset, this article has some words of encouragement for artists. Another great resource that talks extensively about how to develop a healthy mindset is The Creative Pep Talk Podcast.

Remember: We all start somewhere, and your embroidery art journey will be lifelong. Document your progress, keep working on things that feel challenging, and don’t forget to enjoy the process along the way!
Video


![Hand Embroidery Needle Sizes Explained [With Needle Size Chart]](https://crewelghoul.com/wp-content/uploads/2023/08/embroidery-needle-sizes-3-scaled.jpg)


