How To Embroider Pet Portraits [Resources + Tutorials]
Years ago, I began teaching myself how to embroider pet portraits. It was fun and challenging at times, but it also felt long and frustrating to figure out. Eventually, I got the hang of it and have completed hundreds of custom portraits for people’s beloved pets.
There weren’t as many resources online when I first started, so a lot of how I learned was through trial and error. While I will always have areas to improve upon, I feel like I finally have a system and technique that works for me!
I am making this post to share some resources and tutorials that are available on my website and elsewhere that will be very helpful if you’re looking to learn.
Disclaimer: This post has some affiliate links in it. I receive a small commission from purchases at no additional cost to the buyer. I only recommend products I would use and love and that are of good quality. All opinions are my own!
How To Embroider Pet Portraits
There are two different “styles” of pet portraits that you will commonly see. The first style is realistic looking and the second is a more stylized, illustrated portrait.

Techniques To Use
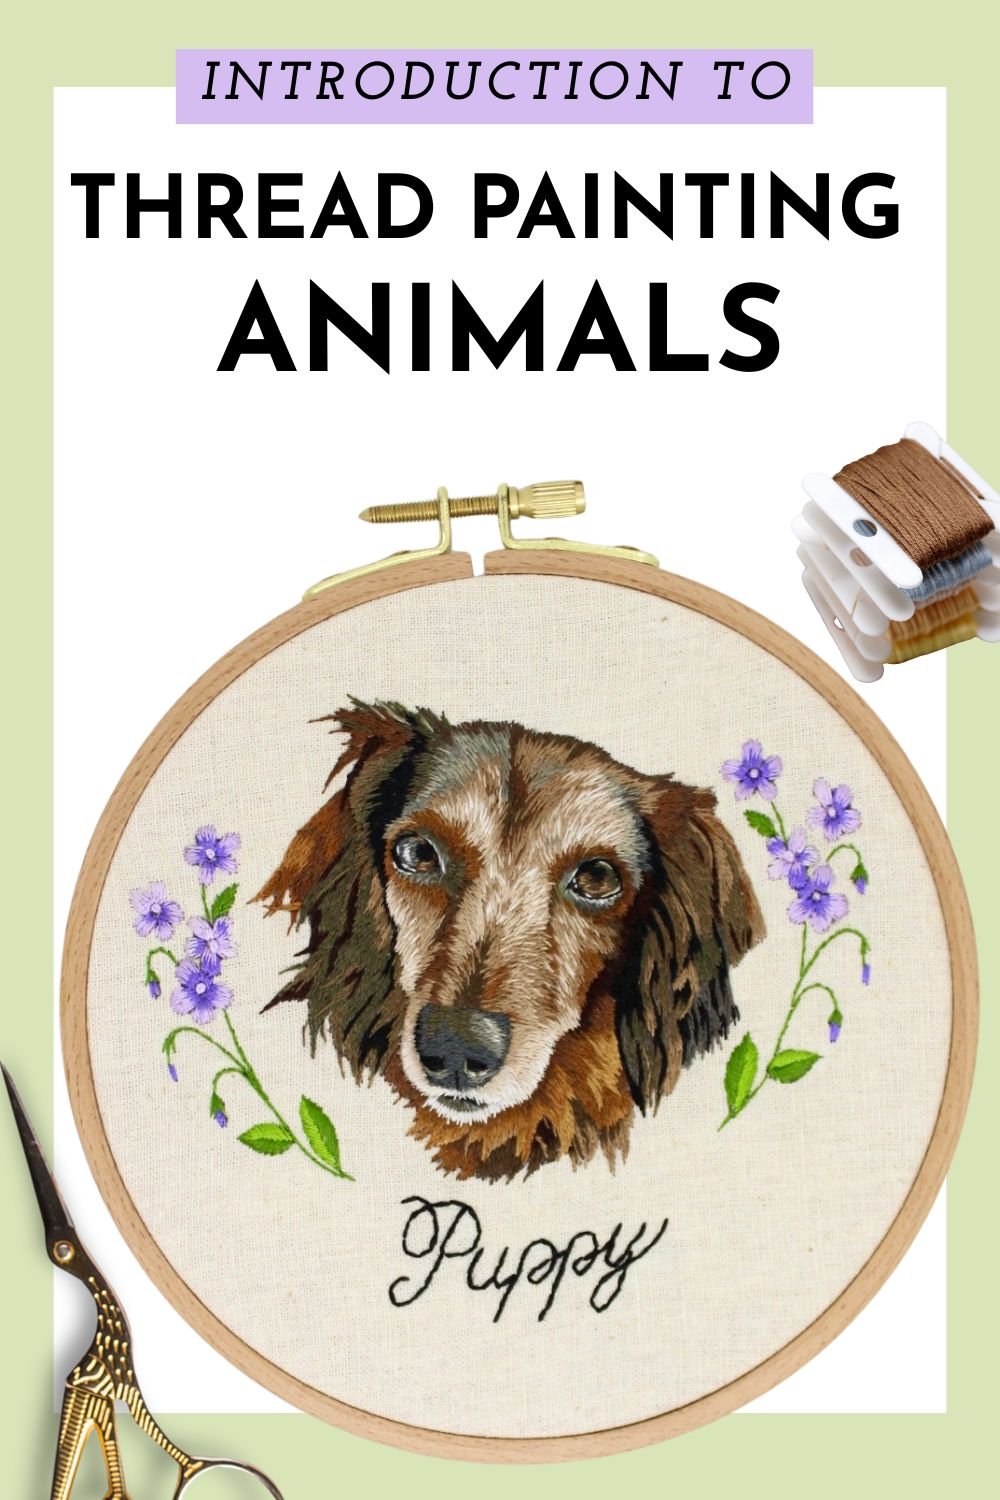
Thread Painting
For realistic looking embroidery, the best technique to use is called thread painting or needle painting. This method of embroidery uses the long and short stitch to blend colors together similar to painting and it allows you to add in fine details and shading into your work.
Illustrated Pet Portrait
The second way to embroider a pet portrait is by illustrating / creating a line drawing of the pet and then embroidering the lines using black thread. This is a less time consuming and somewhat simpler way to complete a portrait of a pet.
If you’re wanting to embroider your own pet but don’t want to deal with creating the design yourself, Cristin Morgan Thread has a custom hand embroidery kit! Upon purchase, send reference photos and you’ll receive a customized pattern to embroider your pet. (Available on Etsy)
The rest of this blog post will be focusing on how to thread paint pet portraits, but most of these general principles will apply to illustrated pet portraits as well!

Finding a Good Reference Photo
Before you can begin a pet portrait, you’ll want to make sure you have a photo that is clear and well lit. This step is CRUCIAL because it will directly affect the quality of the pet portrait you are about to make. You can only stitch what you see, and using a less than ideal photo will sadly be a waste of time.
Avoid blurry, underexposed photos that don’t show the true color of the pet. You should also have a reference photo that is shot at eye level of your pet. Awkward angles of the animal that are shot from above don’t work very well for referencing!
If you already have a photo to work with, choose one that is:
- clear and up close – you should be able to see fur patterns
- well lit – true colors are shown
- shot at eye level – front, 3/4, or side view
- unfiltered – photos that are edited with a filter won’t show accurate colors
If you are going to take a photo:
- Take the photo in indirect light if possible
- Avoid super sunny areas – this will over expose / wash out the image
- Avoid over-editing the photo (changing exposure, shadows, and highlights is fine in moderation)
- Shoot on a phone with a good camera or a DSLR
- Take multiple photos so you have enough options to choose from!
Supplies You’ll Need
You’ll need all of the same supplies you would use for any type of embroidery project with a few additional products and things to consider.
Embroidery Floss
I recommend using DMC 6 strand embroidery floss because there are so many colors to choose from. You’ll be using a lot of colors when thread painting pet portraits so you’ll want to have a good variety on hand.
The other reason I recommend DMC is because it is high quality and colorfast. You’ll most likely want to keep this embroidery for years to come, and DMC colors don’t usually fade over time. Additionally, the thread colors won’t bleed onto the fabric if you end up washing or rinsing your embroidery.
Hoops and Frames
I would personally recommend using a 5 or 6 inch hoop when stitching your first pet portrait. It can be hard to add detail into designs that are smaller, and anything bigger than 6 inches will most likely be overwhelming due to how long it may take to complete.
If you plan on keeping the portrait in an embroidery hoop, these beechwood embroidery hoops available on Etsy are easy to embroider in and they have a nice finish to them for displaying.
If you plan to work on pet portraits frequently, I would recommend investing in a slate frame which provides better tension than an embroidery hoop and is a more ideal option if you plan to frame the portrait when you’re finished.
Fabric
You’ll want a fabric with a tight weave that doesn’t have any stretch to it. A lot of surface area will be covered with stitches so natural, more durable fabrics are best. For all of these reasons, I recommend using linen or cotton for pet portraits.
Kona cotton ( Available at Joann Fabrics and Amazon) is the brand of fabric I use most frequently. It is high quality, can be bought by the yard, and the fabric comes in a variety of different colors.
Stabilizer
In order to make transferring highly detailed patterns onto the fabric easier, I use Sulky Water-Soluble Stabilizer (Available at Amazon) because it is transparent and easy to draw fine details onto.
Another option is Sulky Stick N Stitch Stabilizer (Available at Walmart). This comes in printable sheets and sticks directly on top of the fabric. The only downside to this stabilizer is that the adhesive can make your needle a bit sticky as you are embroidering. If you keep a damp cloth on hand to occasionally wipe your needle off, it’s fine to work with.
If you don’t want to use stabilizer, there are several different ways to transfer patterns onto fabric that you can try.
Embroidery Needles
For thread painting, you’ll want to use a fine embroidery needle. I mostly use one strand of floss at a time, so size 10 DMC embroidery needles work well.
Thread Painting Favorites


Planning And Designing The Pattern
Use a drawing tablet or a light box to reference and trace over the pet’s silhouette and features.
- If you are using a light box, print out the photo and use tracing paper to create your design.
- Start by tracing the general outline of the face, eyes, nose, and mouth.
- Then mark fur patterns and color changes you see in the design.
- It may be helpful to make yourself a separate diagram of the direction you plan to make the stitches.
It’s helpful to create a design that is detailed enough that you can mark where fur patterns, shading, and highlights are but avoid making the design so detailed that it may be confusing to follow.
Everyone creates embroidery patterns differently, so this is something that you’ll probably have to work on. Keep practicing and you’ll start to figure out what works best for you! This tutorial for referencing photos for embroidery designs may be helpful.

Transferring The Design To Fabric
Choose a transfer method that will make the design easy to see and one that will stay on the fabric after long hours of handling and stitching. Here are a few recommendations.
Transfer With Stabilizer
I use a micron to draw on the Sulky Water-Soluble Stabilizer, then place the stabilizer over top of the fabric and place both layers in the embroidery hoop.
Printing Method
Another method that I haven’t personally used but have heard about is printing your design onto the fabric. You can check out a tutorial by Michelle Staub on how to do this here.
Trace The Design
You can also trace the design you’ve made through the fabric using a sunny window or light box, but I have found that it is hard to visualize small details. The quality of your pattern may not turn out as nice this way.
Instant Access To Exclusive Tutorials

If you’re interested in step by step tutorials to help you learn the art of thread painting, which includes many tutorials about animals and pet portraiture, please consider joining my Patreon community!
When you join the Serious Stitcher tier, you’ll get instant access to:
- a monthly thread painting pattern
- behind the scenes content and progress photos
- ability to vote on future embroidery patterns
- instant access to video tutorials, PDFs, and helpful resources

Choosing Colors
This step can be notoriously hard for people. It can take a long time to get a good grasp on picking out colors that are accurate, but there are plenty of tools and techniques that can help.
- A threaded color card is helpful to have so you can see all of the colors that are available.
- Start by choosing the main colors you see in the reference photo.
- Then pick out similar shades based off of the main colors you choose.
- Start with a moderate amount of colors – you can always choose more or put some back.
- When in doubt, do a little color swatch to see how certain colors work together.
It’s important to pick a variety of values for each of the colors. This will add more contrast and help bring the embroidery to life.

Stitching The Portrait
Now comes the fun part, actually stitching your design!
- Make sure to have the reference photo available to look at while you stitch.
- There is no right place to start, but I find it easiest to start with the eyes. Then I make my way to the nose and mouth, gradually working my way outward along the brows and cheeks, finally finishing with the ears.
- Work from dark to light and one area to the next. This will allow you to build up stitches in a smooth way to emulate the fur and features of the animal.
- Have your thread box available – you’ll most likely need to grab additional colors as you work on the portrait.
- Embroidery is relatively forgiving – If there are colors that aren’t quite right or they don’t blend well enough, you can always stitch over the area with another color.
- Take your time – pet portraits are a labor of love, but well worth it in the end!

More Pet Portrait Resources
Here are some tutorials I recommend reviewing.
Blog Tutorials
Patterns
While these designs aren’t customized to a particular pet, they’re a great way to practice the features, fur, and expressions of dogs and cats.
-
Cat + Sardine Embroidery Pattern
Original price was: $10.00.$9.00Current price is: $9.00. -
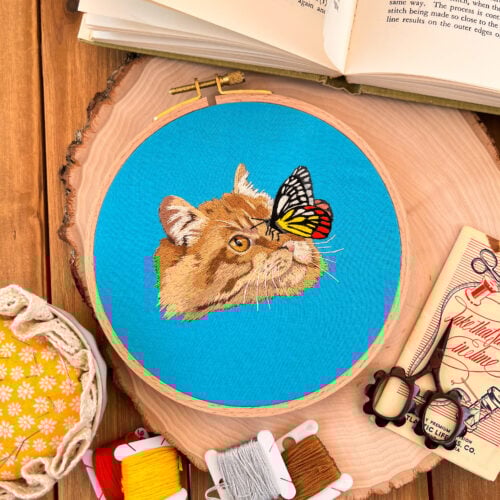
Cat and Butterfly Thread Painting Embroidery Pattern
Original price was: $10.00.$9.00Current price is: $9.00. -
Tabby Cat Thread Painting Embroidery Pattern
Original price was: $10.00.$9.00Current price is: $9.00. -
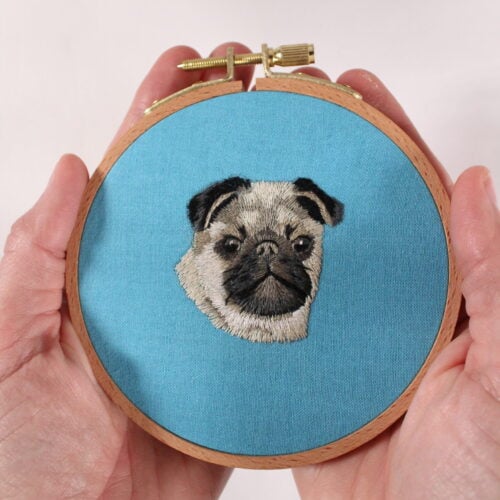
Pug Embroidery Pattern
Original price was: $8.00.$7.00Current price is: $7.00.


YouTube
If you’re wanting to see the overall process of stitching a pet portrait, check out these embroidery artists’ YouTube channels:
These channels may not go into every detail about their process, but there are plenty of videos of portraits being stitched that are still very valuable to learn from!
Online Classes
There are several classes available online that teach you how to embroider realistically and will go over thread painting techniques.
- My course: Embroider A Realistic Butterfly – Available on Skillshare
- Freehand Needle Painting by Chloe Giordano – Available on Domestika
- Embroidered Pet Portraits: The Thread Painting Technique by Michelle Staub – Available on Domestika

Books
Michelle Staub of Stitching Sabbatical wrote an entire book on embroidering your pets! It’s called Pet Portrait Embroidery: Lovingly Stitch Your Dog Or Cat.
I own this book and highly recommend it. It’s filled with helpful information as well as patterns of cats and dogs that you can practice with.
Keep Practicing

The above photo is a comparison of one of the first pet portraits I ever made compared to one I completed in 2021. I show you this not to brag, but to show you that with hard work you will improve, and we all start somewhere!
Let’s face it: Learning how to embroider pet portraits is hard! The first pet portrait you make will most likely not turn out exactly as you pictured it to look, and that is okay! You should be proud of what you make, and see it as a learning process.
If you are struggling or frustrated, keep in mind that it has taken me and many other pet portrait artists years to improve and hone our craft. Everyone needs a pep talk every now and then; take a look at this article for some words of encouragement for artists.
The more you practice, the more you will learn! It is important to try new things and make mistakes along the way because you will learn from them and find a style/particular techniques that work for you.
If you’re feeling lost in your learning journey and you’re in need of some guidance, check out this thread painting technique roadmap I made.
Pet Portrait Tips Video